SEC S20W2 - Mastering Flutter's Widget Tree, State Management, and Essential Widgets

Greetings Steemit friends
- Create a Simple Layout with Column and Row Widgets. Create a simple UI that displays three text widgets vertically using a Column. Inside one of the Column children, add a Row that contains three icons aligned horizontally. Add some space between the text widgets using SizedBox.
For me to achieve a simple layout with the column and row widget, I will be using the state management in Flutter. State management will ease my interaction with the different widgets on the layout.
For this first section, I will go with a stateless widget, which was created by Default on launching a new project. I will be using it here since it is best for static data. The layout will be just text and icons, which will not be dynamic on the application.
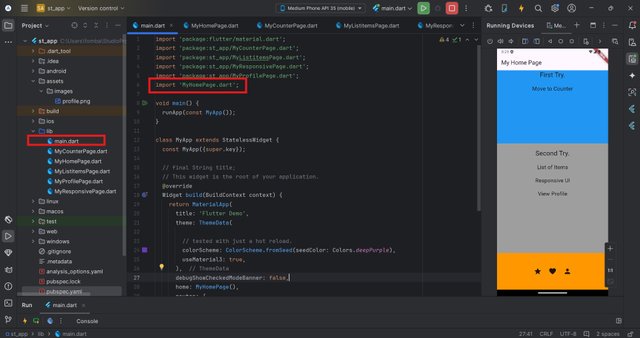
To help me better understand, I decided to create a separate file for layout with Column and Row Widgets.

So, I have managed to apply a stateless widget, making use of the column, Expanded, container, and size box widgets.
- Build a Stateful Counter App. Create a StatefulWidget that displays a number in the center of the screen. Add two buttons, one to increase the number and one to decrease it. Update the state of the app when the buttons are pressed.
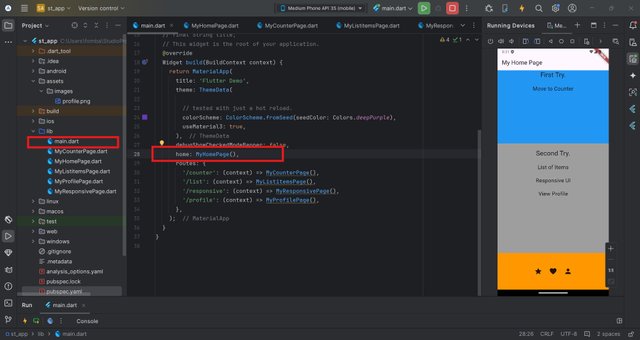
We move to a slightly dynamic page, which will create a counter. The best state for this case is a stateful because we are going to have interactions on the page. To move to the counter page, click Move to Counter.
I created a new file, which will hold my two classes. Here I will be naming MyCounterPage, which will be extended to the statefulwedget. In the state class (_MyCounterPageWidgetState), to be able to have the number increase or decrease. I have to create two different methods which will be used in the class.
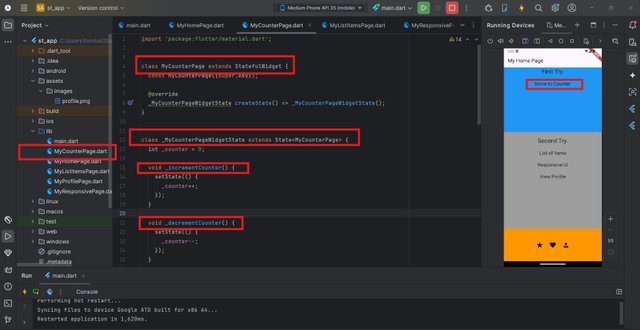
When clicking on the plus sign, this is achieved by using the Icon(Icons.add). We have an increment in the number displayed on the UI. Note our initial value is zero because we declared it on the variable _counter above.
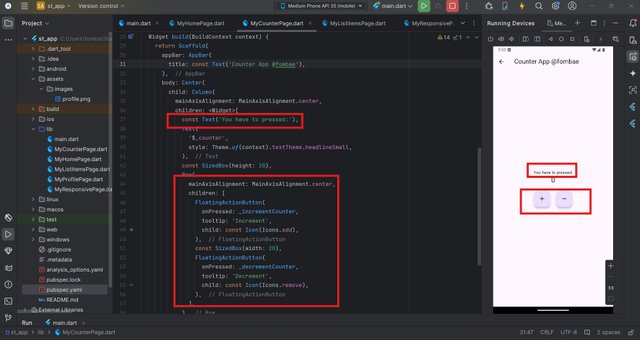

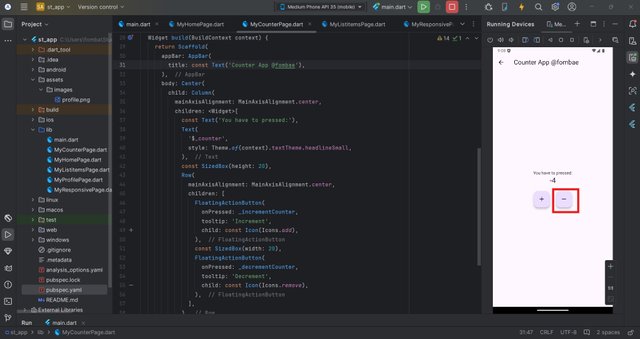
When clicking on the minus sign, which is achieved by using the Icon(Icons.remove). We have a decrease in the number displayed on the UI.
- Create a List of Items using ListView. Create a list of strings (e.g., a list of fruits). Display this list in a scrollable ListView. Each item in the list should be displayed as a Text widget inside a Container with padding and margin.
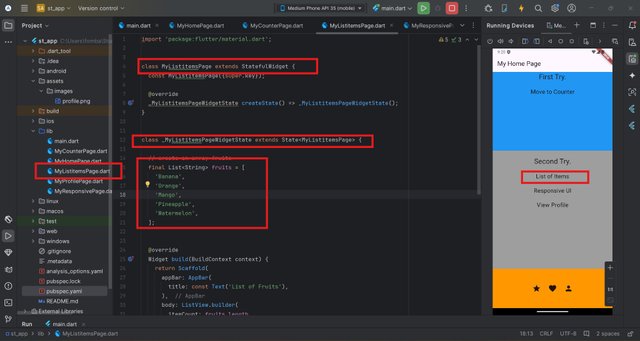
Creating a list means we will have to hold a bucket of more than one item. This means that a page with more than one item, a stateful management will be a better option.
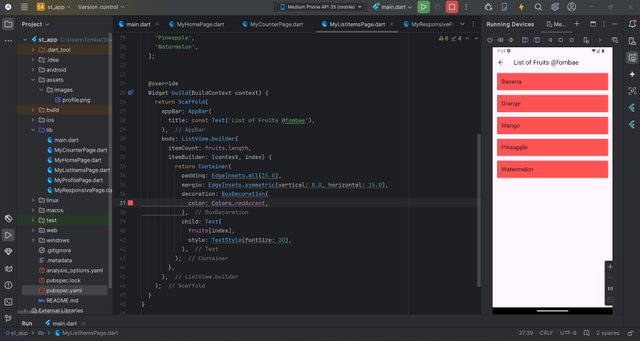
Just like the counter above, I replicated the file and changed the class to MyListitemsPage. In the _MyListitemsPageWidgetState close, I created an array of fruits.
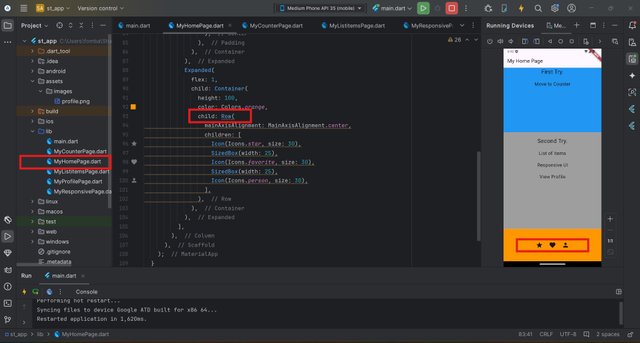
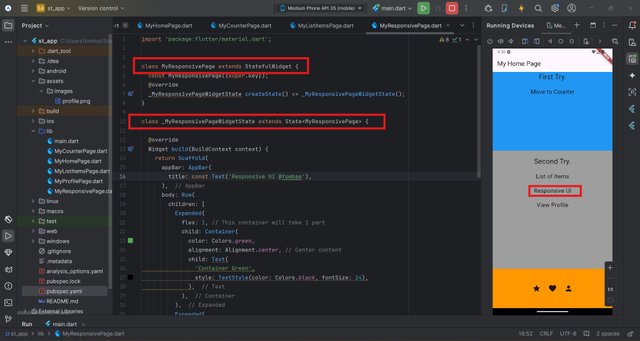
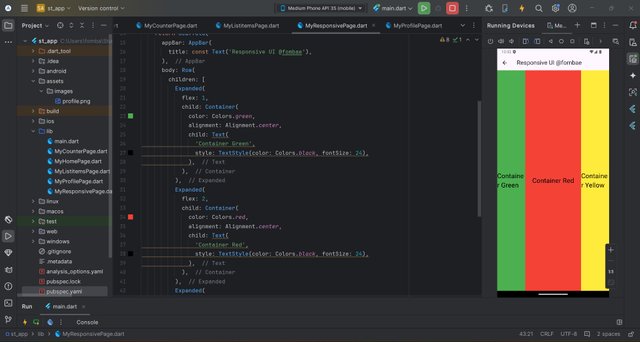
- Explore Flex and Alignment with a Responsive UI. Create a layout where three Container widgets are displayed in a row. Use Expanded to make one Container take up twice the space of the others. Use alignment properties to center the content within each Container.
From my understanding, Apart from the fact we are using rows in this case. It is not different from the structure we have on the home page layout.
Project:
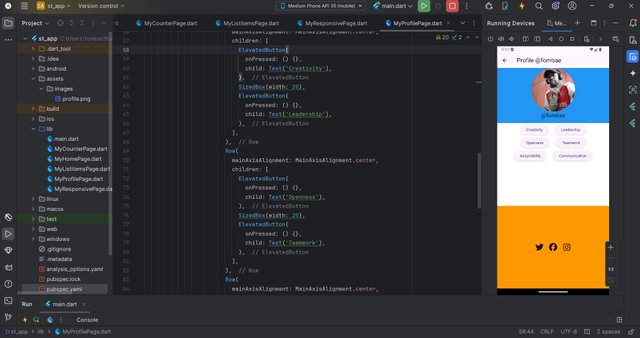
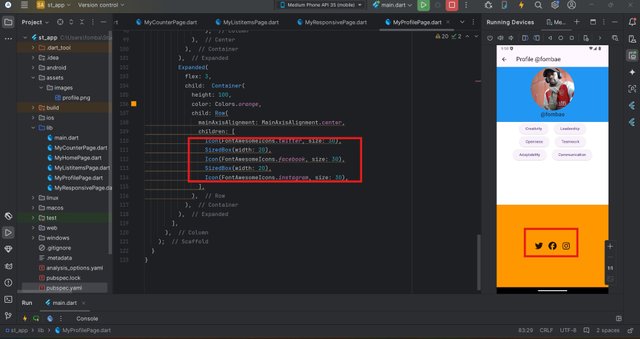
- Profile UI: Build a simple profile screen layout using various Flutter widgets. The screen should include a round profile image, social icons in the horizontal alignment, text as name, and buttons representing his different skills and attributes. These all should be aligned using the layout widgets discussed. Use SizedBox where needed.
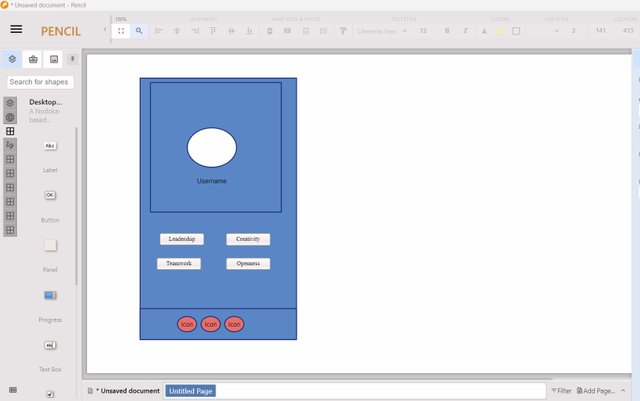
Here, I started by creating a mockup to help me. It is important when you have a sample of a project in a sketch format. So I first sketched what the project would look like.
I will be trying to apply all the widgets used above to accomplish this project. I started by creating a new file MyProfilePage, which will hold the stateful classes for the page.
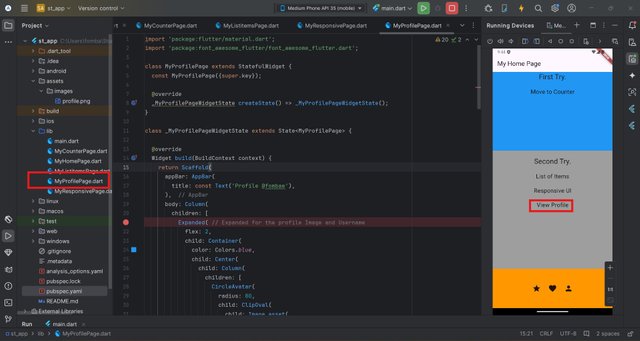
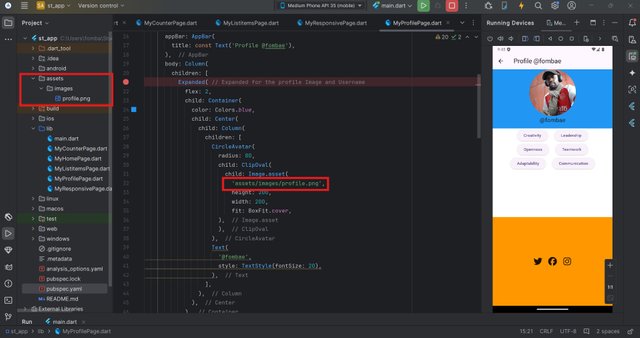
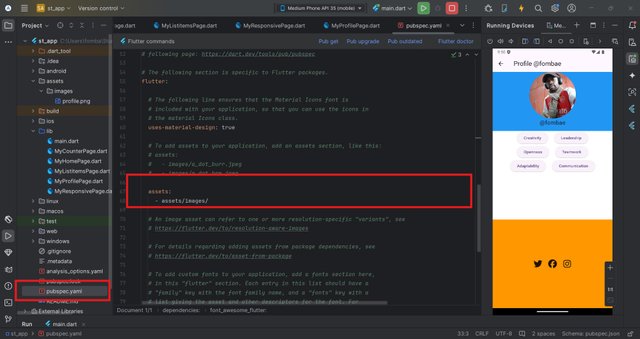
I had a challenge in displaying images. To resolve it, I had to create a directory in the root and update the pubspec.yaml to be able to add assets.
Different skills in a row widget
To be able to display the social icons, I needed to update my pubspec.yaml in the root directory. So I added font_awesome_flutter: ^10.0.0 under dependencies.
Note: always make sure your pubspec.yaml is up to date after any changes.
Cheers
Thanks for dropping by
@fombae