10 Easy DIY Tutorials For One Of A Kind Wall Art
1. Dots on Canvas
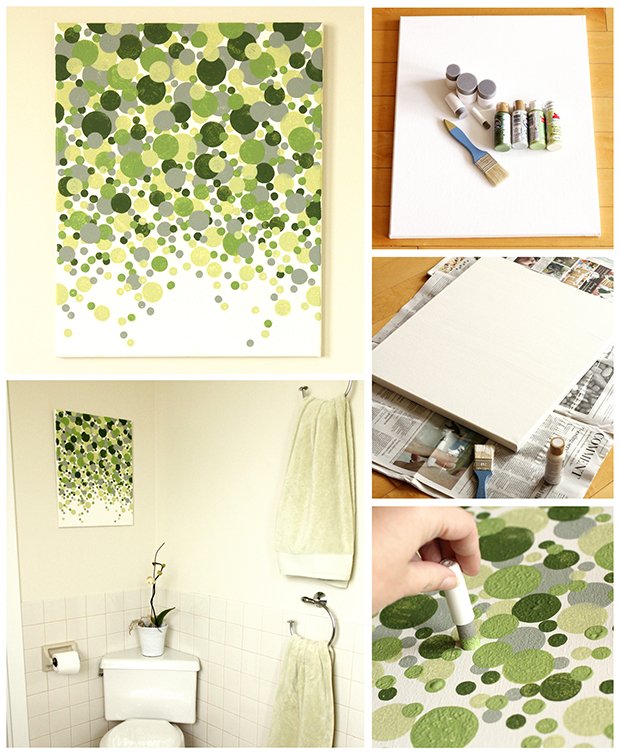
DIY Wall Art Anyone Can Make – We've lived in our new house just about 18 months now. Like the vast majority, we did all the enormous updates first and now we're simply making changes all over. Our en suite restroom is a monotone cream shading and keeping in mind that it looks perfect and basic it likewise looks a minor piece exhausting. I figure it's simply Michael and I who ever observe it however notwithstanding for us it required a bit of something. Michael is one of those folks who likes to have a say in how the house is improved – no pinks or botanical's for him. We chose that as opposed to painting the restroom, we'll endeavor to get more shading with highlight pieces, so to begin things off I chose I could influence a brisk and simple canvas to divider workmanship.
This is something anybody can do… no craftsman ability required for this task. Gracious, and did I specify this is super modest to make as well.
Materials:
3-4 unique shades of paint (I utilized modest acrylic paint from Michaels – $1.99 a tube)
1 shade of paint for the base and a brush to apply it
Canvas (once more, I got this for about $5 at Michaels)
Roundabout pouncers (mine where Martha Stewart pouncers)
Hanging supplies (pound, nail, string/wire, staples)
Instructions:
- Lay your canvas on some old daily paper and paint the whole thing with your base shading – I utilized a warm white shading. Permit to dry.
2.Starting with your biggest pouncer, spot into paint and after that onto canvas – principally at the best and spread out. Presently, utilize the following biggest pouncer and do a similar thing yet go down the canvas somewhat more. Convey this on with all the pouncer sizes until the point when you're utilizing the littlest pouncer sporadically at the base of the canvas. Try not to go appropriate to the base of the canvas (unless this is a look you need).
3.Repeat this same procedure with all your paint hues.
4.When everything is dry I reapplied a portion of the main hues I utilized once more, to make sure they weren't covered underneath the various paint and to fill in any open spots.
5.Allow to totally dry.
6.Staple string/wire equitably over the back of the canvas. Put a nail in the divider where you'd like the divider workmanship and afterward hang the canv
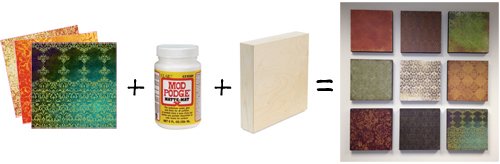
2. Scrapbook Paper Panels
On the off chance that you have a major clear divider, and you need to adorn it reasonably, here's your answer: scrapbook paper divider workmanship! This divider workmanship can cover in excess of 9 square feet of divider space. I've seen comparative arrangements of divider workmanship offering in retail locations and indexes for $250+! Be that as it may, today I will demonstrate to you proper methodologies to make this divider craftsmanship with your most loved hues, for far less cash.
Scrapbook paper is a shoddy method to get proficient quality examples, in any shading you need. Each sheet of paper costs just 50 pennies to $2 and no more. Extremely reasonable! How to make this divider craftsmanship? It's as straightforward as this:
Here’s the steps to make this wall art:
1. Choose nine coordinating but contrasting scrapbook papers.
For help, visit my Guide to Where to Buy Scrapbook Paper. The paper is typically 12″ x 12″. Utilize thicker scrapbook paper. Thin scrapbook paper tends to wrinkle substantially less demanding.
2. Get nine 12″ x 12″ panels.
I utilized American Easel Wood Painting Panels from Blick Art Materials. Beneath, I indicate more alternatives for you that cost just a couple of dollars.
3. Paint the edges of the wood panels or canvas.
I painted with dark acrylic paint. You can paint any shading you need.
4. Brush a layer of glue on one panel.
Before, I utilized Mod Podge or Aleene's Tacky Glue. Presently, I utilize Golden Mediums.
5. Apply a piece of scrapbook paper to the panel.
To smooth the paper onto the board, utilize a brayer, ruler, measuring stick, whatever level edge is convenient. Now and then I utilize a Visa! Begin smoothing paper from the center and push out toward the edges. Here are guidelines from Mod Podge to show signs of improvement decoupage comes about.
6. Glue paper to the remaining 8 panels.
OPTIONAL. Seal the papers.
You can leave the papers unlocked, or brush a layer of Mod Podge or Aleene's Tacky Glue over them. I unintentionally spread Mod Podge on a few papers, so I brushed a layer of matte Mod Podge over the greater part of the papers and this shrouded the smears.
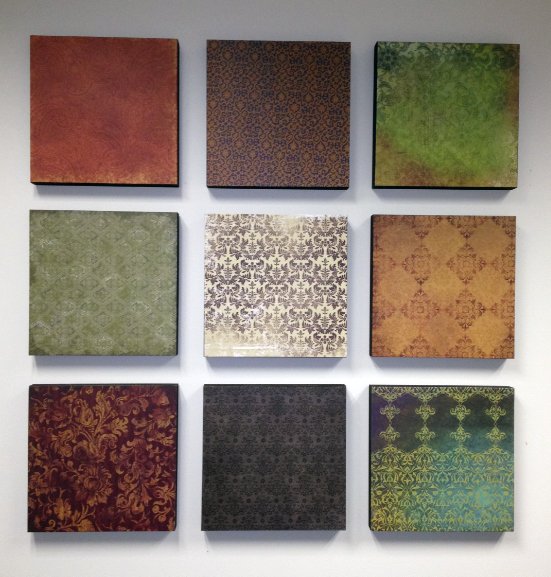
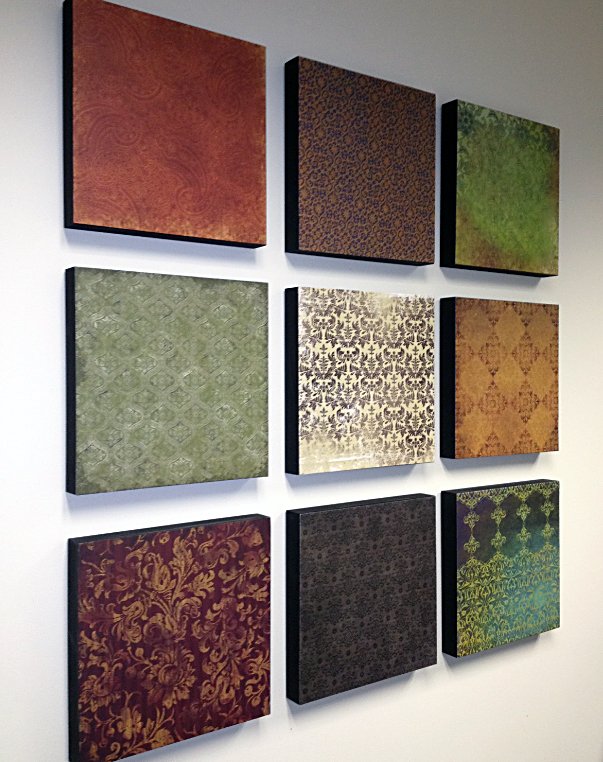
The Finished Result: SCrapbook Paper Wall Art
There was a tremendous clear divider in my office. My working environment has bunches of white and beige dividers. This undertaking included a major matrix of shading and example to my office divider, and this makes me cheerful, imaginative and propelled at work. This undertaking is awesome for any enormous space where you need huge moderate divider craftsmanship. It covers around a 3-foot by 3-foot space:

3. Easy Butterfly Hearts
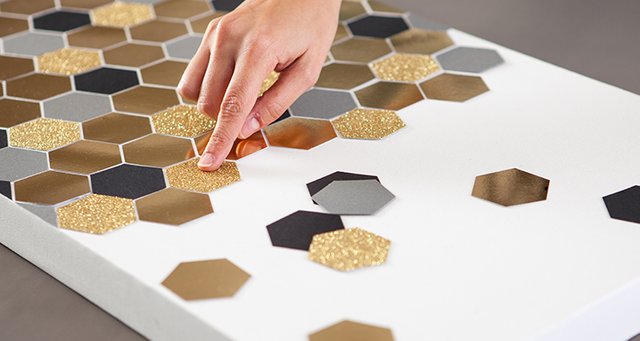
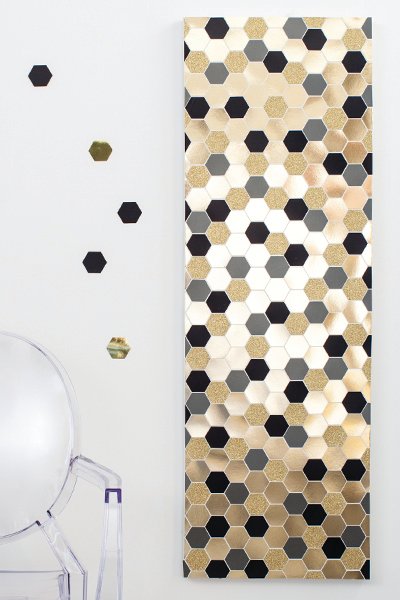
4.Metallic Hexagons
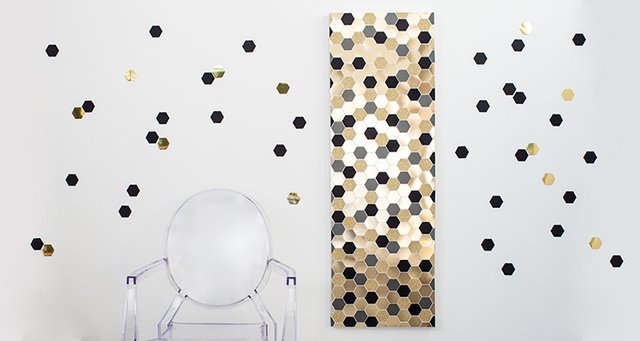
This year I'm adoring metallics and geometrics, two of the most smoking patterns in home stylistic theme and one approach to get the take a gander at your place is with my shimmery hexagon divider craftsmanship. Best hung where the light hits to make delightful reflections around the room, make one today for a design articulation at your place.
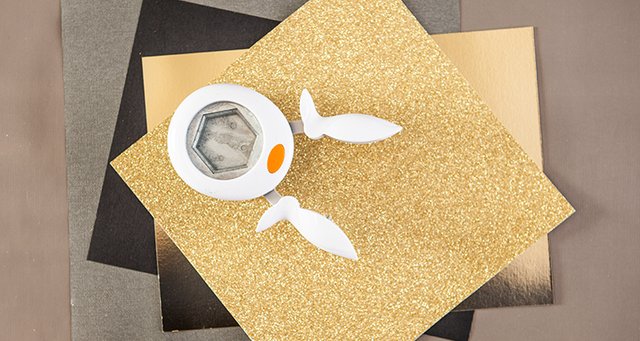
YOU’LL NEED
Gold sparkle card
Gold thwart card
Dark and charcoal heavyweight paper or card
Fiskars hexagon paper punch
Shabby art stick
Extended canvas
Scissors
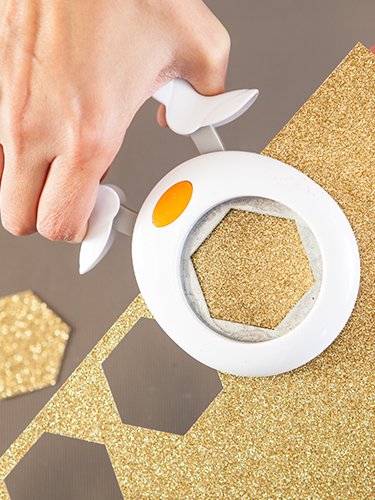
Step 1
Cut out a pile of hexagons utilizing your paper punch. On the off chance that you don't have a punch, make yourself some tea and take as much time as necessary doing them by hand utilizing a format and sharp scissors.
Step 2
Mastermind the hexagons on your canvas. Begin at one side and work your way over. For the edge pieces utilize half hexagons.
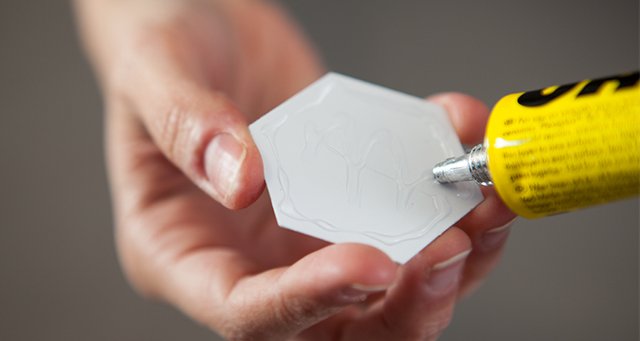
Step 3
On the off chance that you like the situation of the pieces begin adhering making a point to get stick the distance to the edges of the pieces. This prevents them from twisting up
TIP: I discovered the majority of my provisions, including the hex paper punch at Spotlight.
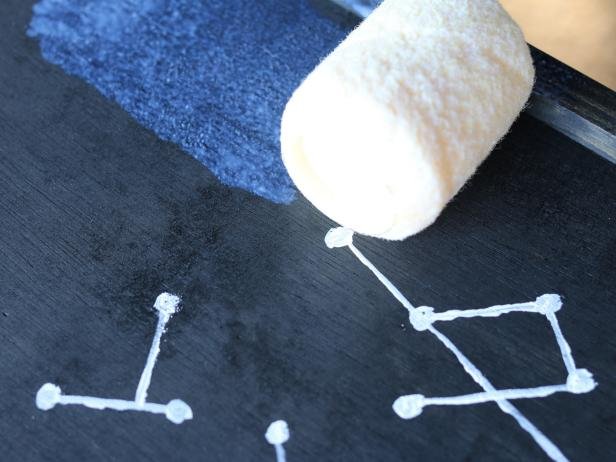
5. Illuminated Constellations
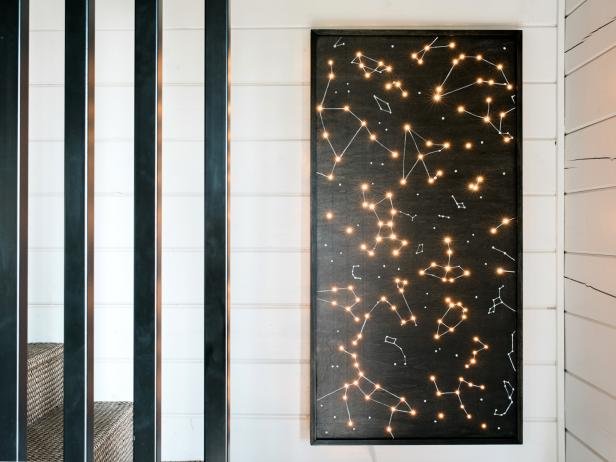
INTRODUCTION
Give the indications of the zodiac a chance to illuminate your dividers with this fun DIY venture.
STEP 1
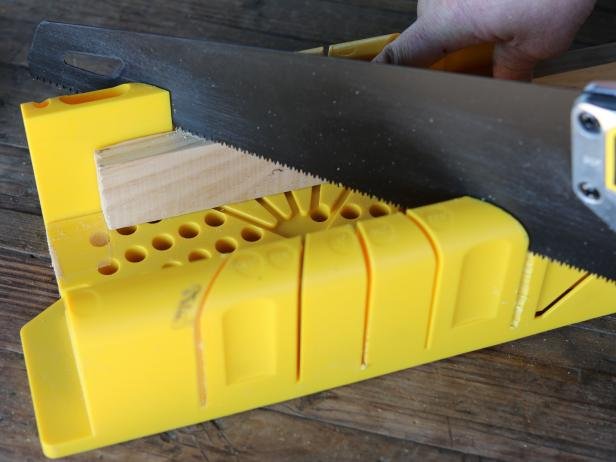
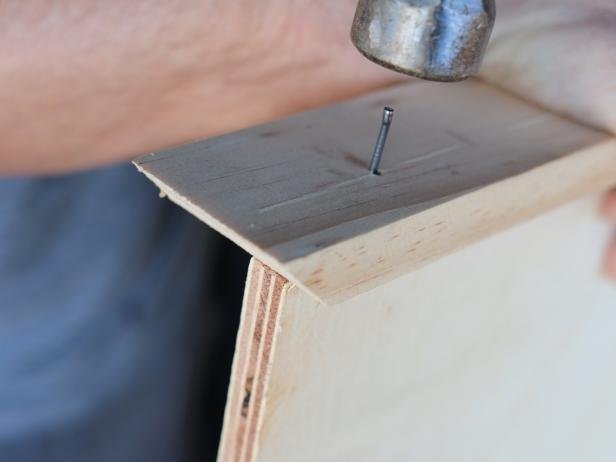
Miter Trim and Attach to Plywood
Cut 1x2 pine or birch trim to estimate, cut the closures at 45-degree points on the miter saw. When all bits of trim are mitered, affix them along the border of the plywood with picture nails. The precise back of the plywood ought to sit flush with the back of the trim. The front of the trim ought to sit glad for the plywood, bringing about a lip around the front.
STEP 2
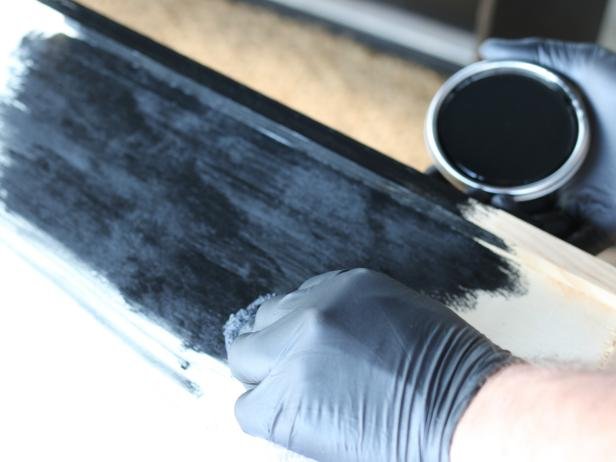
Apply Stain
Utilize a cloth to apply an even layer of stain to the plywood and the trim. Enable it to dry.
STEP 3
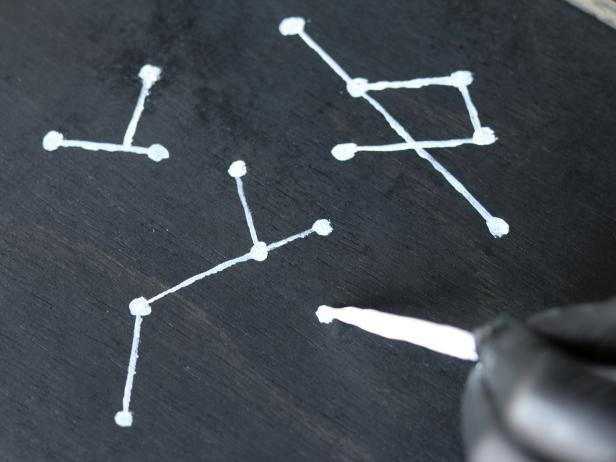
Paint Star Chart and Add Holes
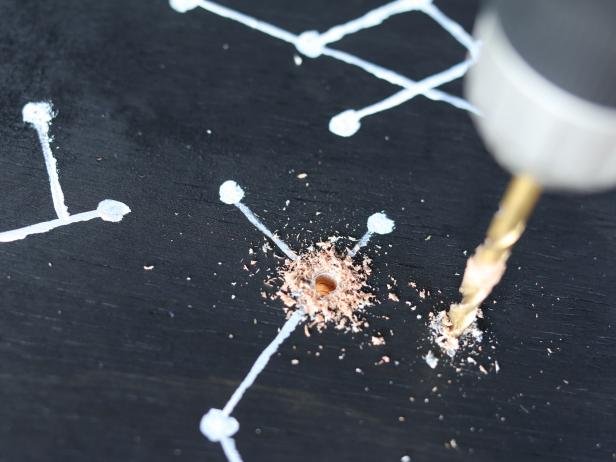
Utilize a little detail paintbrush and white semi-shine paint to make the star groupings. This can be charitable and irregular or done truly in reference to a genuine star outline.
Utilize a 1/4" boring apparatus to make the gaps specifically through the painted spots (stars).
STEP 4
Seal with Polyurethane
Wipe wood shavings from the surface of the plywood, at that point utilize paint roller to include an even layer of sealer.
STEP 5
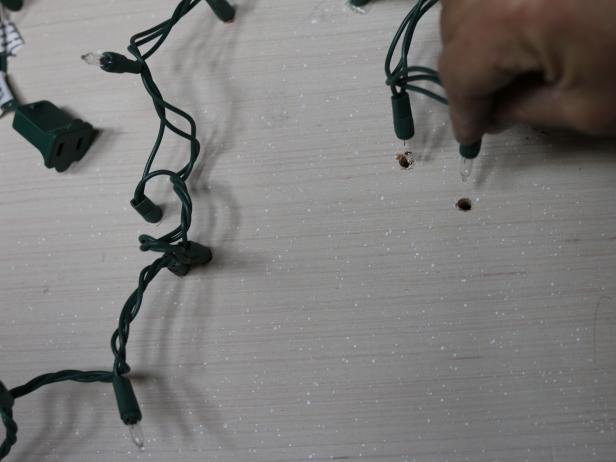
Add Twinkle Lights
With the plywood flipped around, push every one of the twinkle lights through the bored gaps. When all openings are filled, utilize electrical tape to secure the finishes of the twinkle light lines to the back of the plywood. Hang the star grouping workmanship on the divider, at that point connect to the lights.
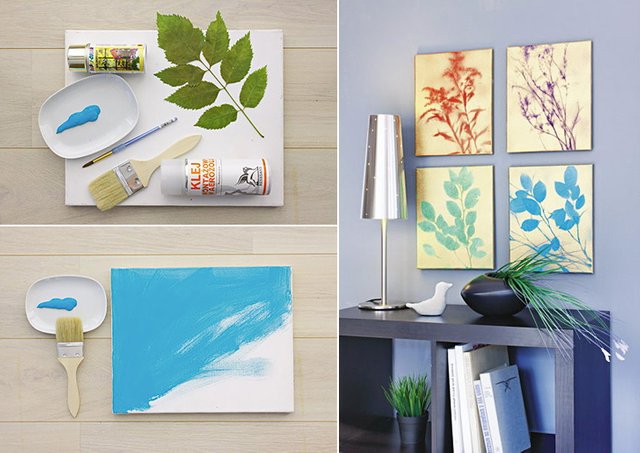
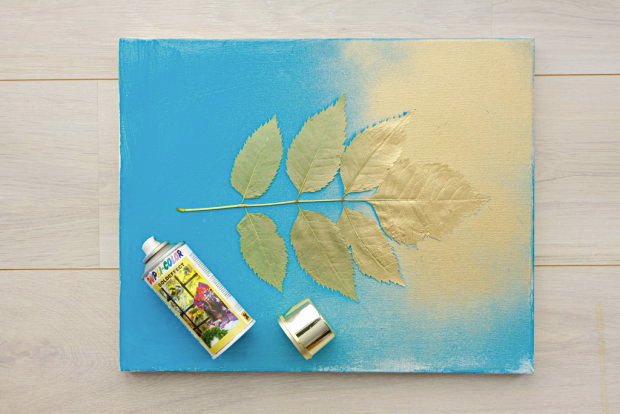
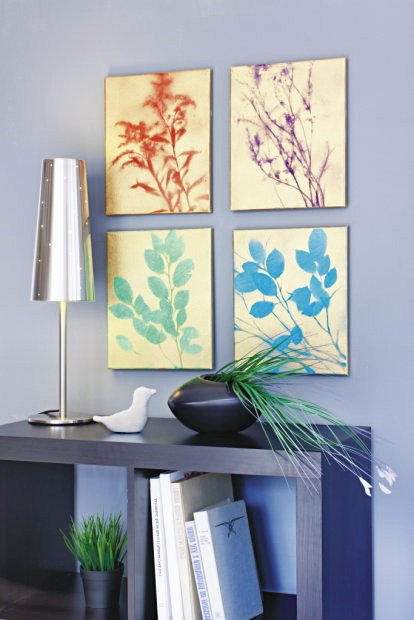
6.Spray-Painted Nature
When you feel your dividers are vacant, exhausting or not very new, consider putting some craftsmanship on it. It won't be one of those favor, approach to costly for you to manage the cost of it, painting. I will demonstrate to you proper methodologies to paint some brightening canvas snappy and simple, moderately modest and extremely wonderful.
In spite of the fact that I am not a gigantic fanatic of elegant decorations of any sort, either on the off chance that it is a bit of texture or a divider, I have discovered something intriguing that you can do it without anyone's help at home even with your more seasoned tyke. This time a Polish site czterykaty.pl, uncovered the coolest Silhouette Botanical Art D.I.Y task, and I should concede, I'd get a kick out of the chance to do it one day as well.
These sorts of materials utilized for it, are anything but difficult to get in stationer's, particularly the one for specialists. On the off chance that you choose to go ahead with this venture together with kids, recollect about getting a few covers so they wouldn't inhale the chemicals from splash paint.
Since the guidelines from the source are in Polish, we've interpreted the entire points of interest of those amazing Botanical Art Canvas for you. Obviously hopefully we will see your works too on our facebook. Have a great time!
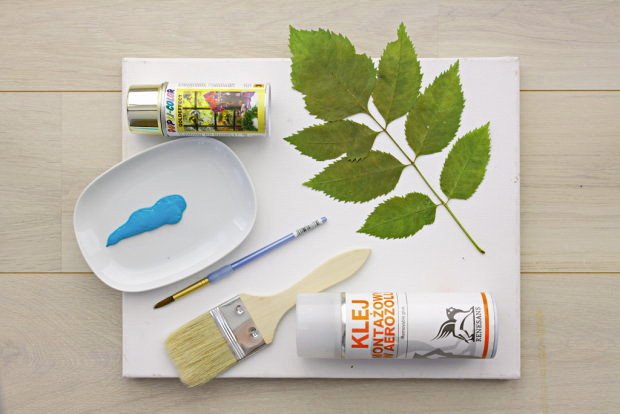
What you need:
Tools:
Two brushes (one to paint the page and another for points of interest)
Supplies / ingredients:
A sheet of paper
Splash paint (any shading you like)
A bowl to put the paint in
Any sort of leaves, blossoms or grasses that'll lay level.
Send your children to search for some in the closest wood
or on the other hand knoll
Splash on cement (vital however any sort would be
great)
Mounting board or an edge
STEP 1
On an ensured work space, paint the whole sheet of paper with your most loved shading and let dry a while.

STEP 2
Shower the back of the leaves or blossom with the sticky paste and tack it onto the painted surface. All together that the following paint layer wouldn't leak under, push down the edges of a leaf extremely neatly.

STEP 3
To make smooth and non drippy outcome, shower the whole surface and leaves, from left to right and from 1-2 feet away. Peel away leaves or bloom or anything you needed to paint – do it truly deliberately!
P.S. On the off chance that you need to include some more creative look, utilize your detail brush and make some sensitive smears or shadows with an alternate shading paint. Presently your unprecedented work is prepared to be put on the divider.
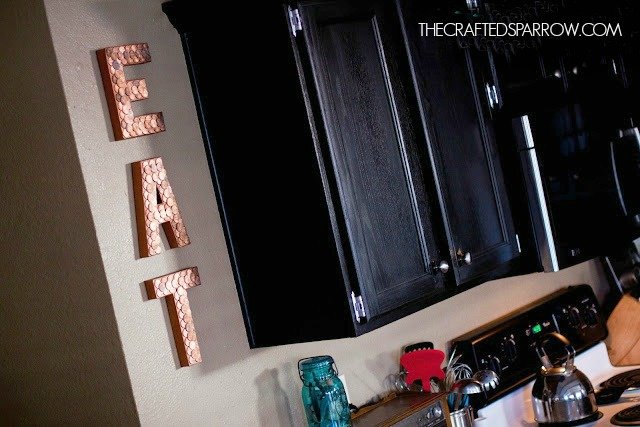
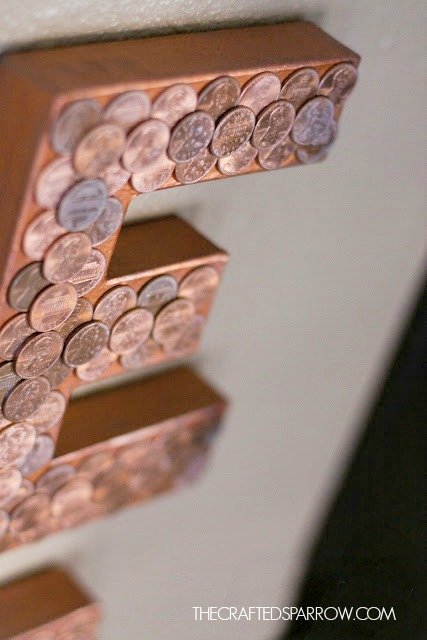
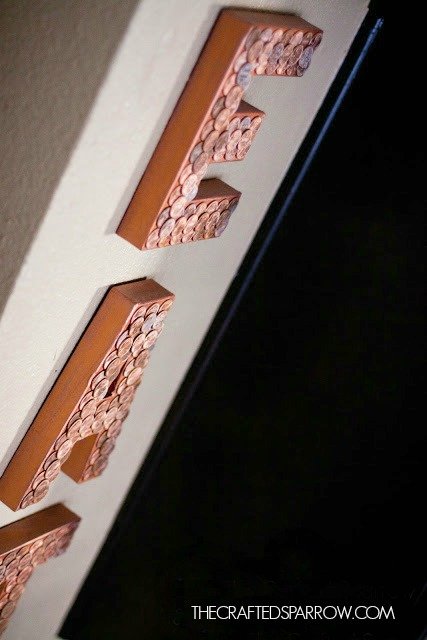
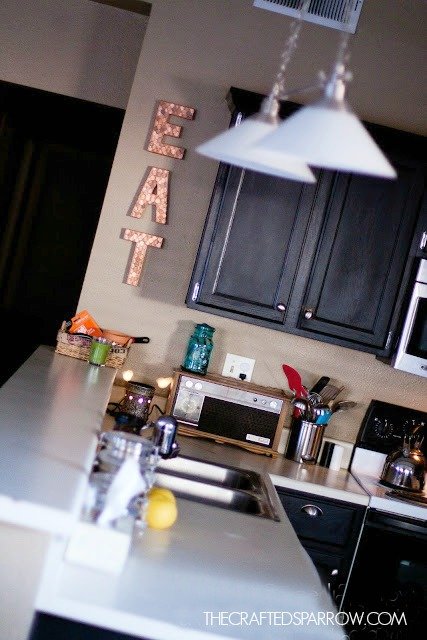
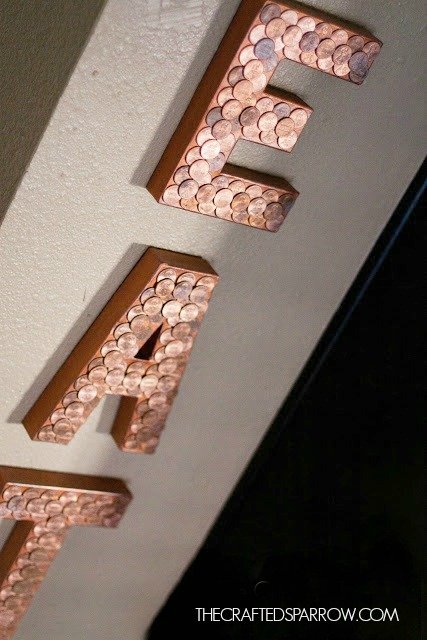
7.Penny Words
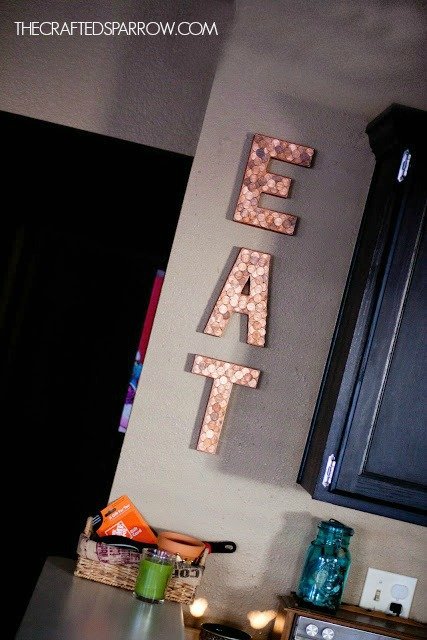
Beforehand on Pinterest I've seen a couple of undertakings individuals had posted utilizing change like pennies and nickels to tile their floors, or the ledges. It's an extremely cool look. I have a companion who was considering doing it, however has since chosen to go the solid course. Despite everything she needed the pennies and copper look in her kitchen so as a housewarming present for her I made this
– Paper mache letters
– Pennies
– Weldbond paste or E6000
– Copper acrylic paint
– Foam brush
– Clear splash sealer, found by the shower paint
Begin by painting your paper mache letters copper. I completed two layers and that was sufficient to cover the paper mache. After I painted it copper I utilized a gunmetal silver shading with a dry brush method to give it somewhat of a patina.
At that point prepare your paste. I think this paste worked entirely well. We'll perceive how it holds up after some time. You'll additionally need to begin selecting your "great" pennies. I picked for the most part gleaming, yet tossed a couple of more blunt ones in with the general mish-mash. That makes character.
I then layed out the pennies on each letter early. That way I new precisely what example, and position they would have been in. I put most face up, yet did some face down as well. At that point you simply stick until the point that your hearts content. When you have them all stuck on and they are generally dry (let it sit for no less than 24 hrs) you can splash them with a reasonable silk or gleaming shower paint. I did it to ensure the pennies and the copper paint on the paper mache.
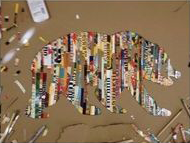
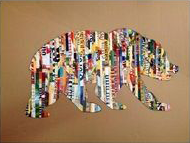
8.Magazine Strip Silhouette
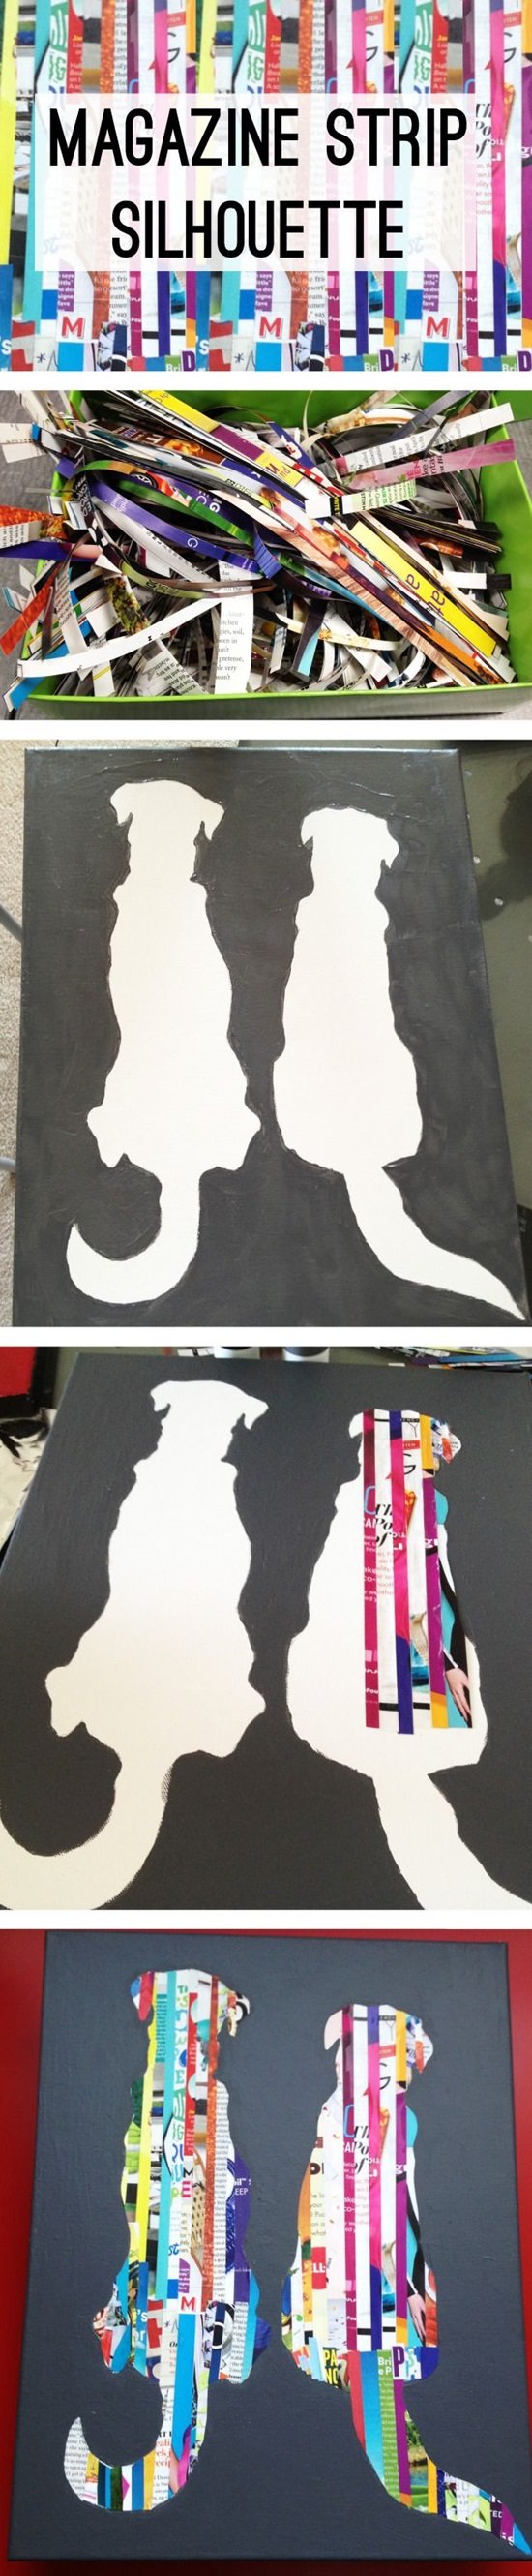
Make Stunning Silhouette Art With Colorful Magazine Strips!
Back in center school, I for all intents and purposes remained in the craftsmanship room. I invested so much energy making new canvases, illustrations, making and the sky is the limit from there! I cherished investing energy in there. I miss it. Be that as it may, in any case, enough with my recollections! One craftsmanship piece I recollect was outline workmanship, I cherished outlines! This task I will demonstrate you today is magazine strip outline craftsmanship. All you require is six things and imagination.
Things You'll Need:
A pencil,
A substantial illustration/photo (cut along the layout of the outline) Tip: A photo from an old divider logbook works incredible!
Scissors
Development or notice board
Vivid magazine pages cut into strips
Elmer's paste, or any nice paste stick
- Subsequent to collecting your provisions, put the photo on the blurb board, and follow the framework with a pencil. Good luck with that on the off chance that you can draw your favored outline layout by hand without following!
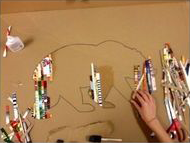
- Cut the magazine strips into the right size to coordinate your framework and place them one next to the other. Focus on the bends along your framework and slice the strips to coordinate the bends. This is the place some time, persistence, and scrupulousness will guarantee the most ideal completed item. Along these lines, snatch a drink and don't surge!
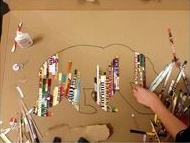
- Confirm the magazine strips are sliced to the right length and that the edges coordinates the bends previously applying paste and adhering it to the notice board. In the event that you experience difficulty cutting absolutely with scissors, you can attempt put clear glass over the notice board, at that point put the strips over the glass and cut the strips with an extremely sharp steel or cover shaper by following along the diagram.
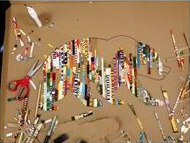
- When you wrap up the magazine strips along the outline, delete any noticeable pencil diagram, and prepare to respect your magnum opus!
- Your outline workmanship is prepared. Contingent upon the style of your home stylistic theme, you can hang it up as is with some string, or give it a more tasteful look by placing it in a casing that matches whatever is left of your specialty.
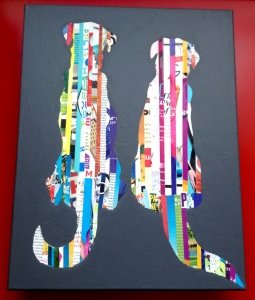
In the event that you favor the look of "oil on canvas", you can utilize the same above recorded approach on canvas, and paint the foundation in a shading that interests to you and will coordinate your home stylistic layout. All things considered, world class inside plan dependably guarantees concordance between workmanship, furniture, lighting, and paint! The canvas in the picture with two canine outlines is an extraordinary case of outline workmanship with magazine strips on canvas with oil paint out of sight.
9.Feather Duster Art
MAKE CHEAP FEATHER DUSTER WALL ART
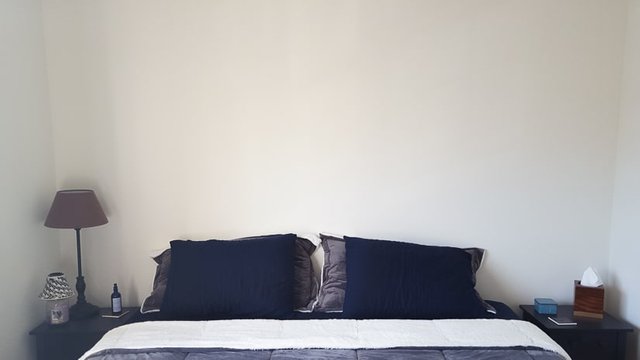
I've been toying with what to hold tight our enormous discharge room divider for some time, however craftsmanship is costly—particularly huge bits of workmanship. At our old lofts, we had an embroidered artwork Mike got in Cambodia hanging over our bed. In any case, it's experienced more promising times, so it didn't influence it to up onto the divider in this room (as yet making sense of what to do with it!).

I don't generally know anything about craftsmanship, however, so I experience considerable difficulties valuing it, particularly when it is costly. So I chose to try different things with a clear canvas, some acrylic paint, and a plume duster to perceive what I wound up with. Since I have the coolest guardians on the planet, they really let me paint my room utilizing a quill duster when I was more youthful. Be that as it may, a whole room shrouded in splendid red and metallic gold blasts would most likely give me a headache now, so a 24″ by 36″ canvas is about whatever I can take.
Here’s what I used to make my feather duster wall art:
36″ by 48″ clear canvas—you can peruse different sizes online here
Three diverse acrylic make paints, ideally in logically lighter shades—I utilized naval force blue, light blue, and metallic silver
Ostrich plume duster—It's vital to get an ostrich quill duster, not a customary quill duster. Standard plume dusters make a stiffer-looking example and tend to shed!
Drop material, latex gloves, paper plates, paper towels, scissors
And here’s how you can do it in only about 30 minutes.
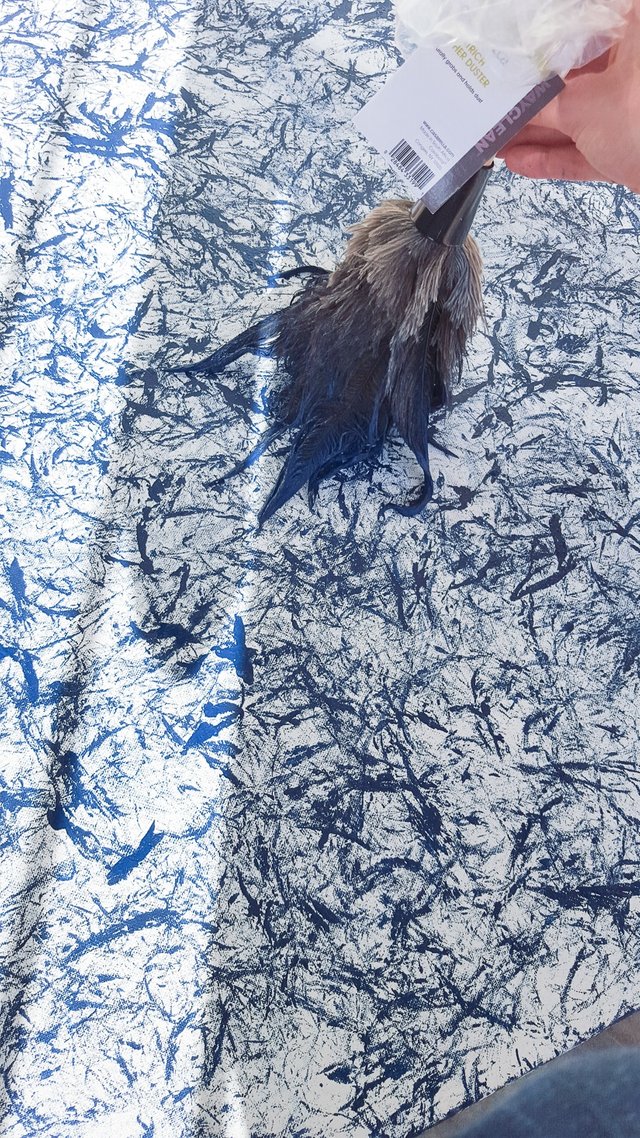
Step 1: Begin with your darkest shading. I poured the naval force paint onto a paper plate, dunked the quill duster in, and started smearing the paint onto the canvas.
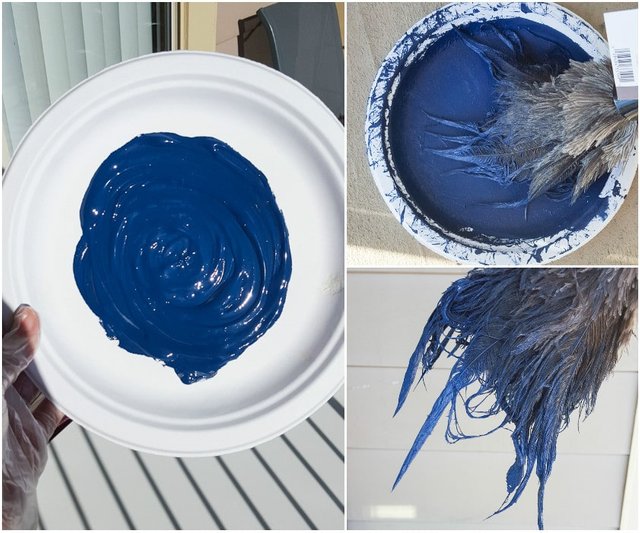
I didn't have an arrangement now; I simply attempted to influence it to look cool. I for the most part utilized the plume duster to smudge the shading, yet I likewise completed a touch of dragging in swirly designs.
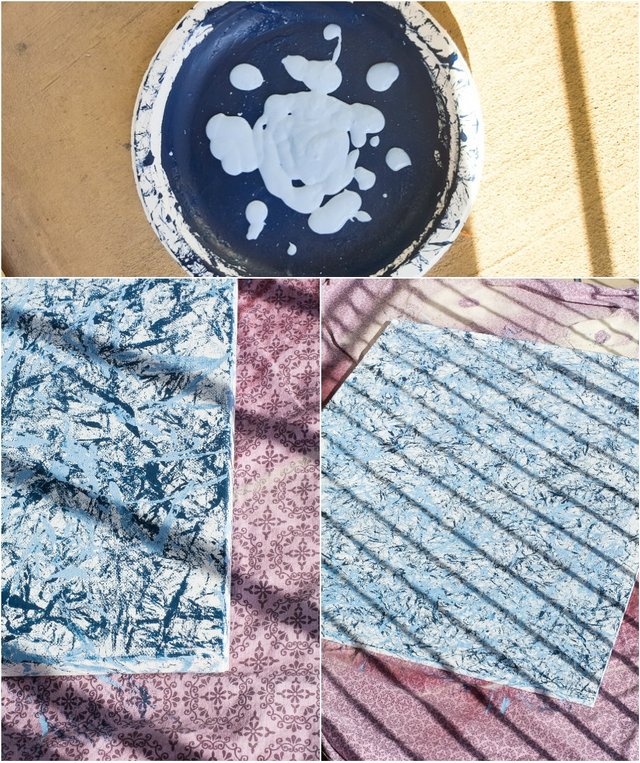
Step 2: Next I dumped the container of light blue onto a similar paper plate and rehashed the initial step utilizing a similar plume duster. I wasn't generally stressed over blending hues since they were both blues.
MAKE CHEAP FEATHER DUSTER WALL ART
January 5, 2016 by Brittany Goldwyn
Share This Post:
237
Shares
I’ve been toying with what to hang on our big empty bedroom wall for a while, but art is expensive—especially big pieces of art. At our old apartments, we had a tapestry Mike got in Cambodia hanging over our bed. But it’s seen better days, so it didn’t make it up onto the wall in this bedroom (still figuring out what to do with it!).
Make Cheap Feather Duster Wall Art
I don’t really know anything about art, though, so I have a hard time appreciating it, especially when it is expensive. So I decided to experiment with a blank canvas, some acrylic paint, and a feather duster to see what I ended up with. Since I have the coolest parents in the world, they actually let me paint my room using a feather duster when I was younger. But an entire room covered in bright red and metallic gold explosions would probably give me a migraine now, so a 24″ by 36″ canvas is about all I can take.
Make Cheap Feather Duster Wall Art
Here’s what I used to make my feather duster wall art:
36″ by 48″ blank canvas—you can browse various sizes online here
Three different acrylic craft paints, preferably in progressively lighter shades—I used navy blue, light blue, and metallic silver
Ostrich feather duster—It’s important to get an ostrich feather duster, not a regular feather duster. Regular feather dusters create a stiffer-looking pattern and tend to shed!
Drop cloth, latex gloves, paper plates, paper towels, scissors
And here’s how you can do it in only about 30 minutes.
Step 1: Start with your darkest color. I poured the navy paint onto a paper plate, dipped the feather duster in, and began blotting the paint onto the canvas.
Make Cheap Feather Duster Wall Art
I did not have a plan at this point; I just tried to make it look cool. I mostly used the feather duster to blot the color, but I also did a little dragging in swirly patterns.
Make Cheap Feather Duster Wall Art
Step 2: Next I dumped the bottle of light blue onto the same paper plate and repeated the first step using the same feather duster. I wasn’t really worried about mixing colors since they were both blues.
Make Cheap Feather Duster Wall Art
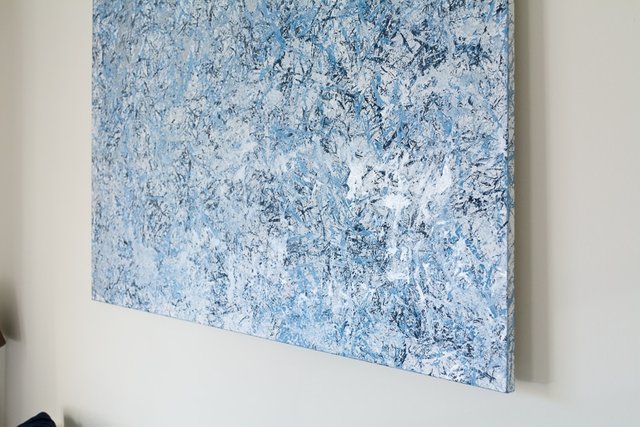
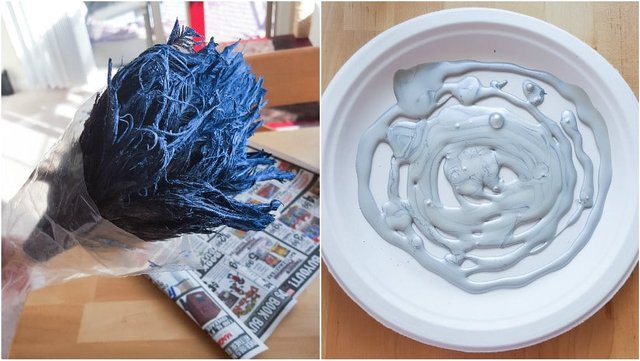
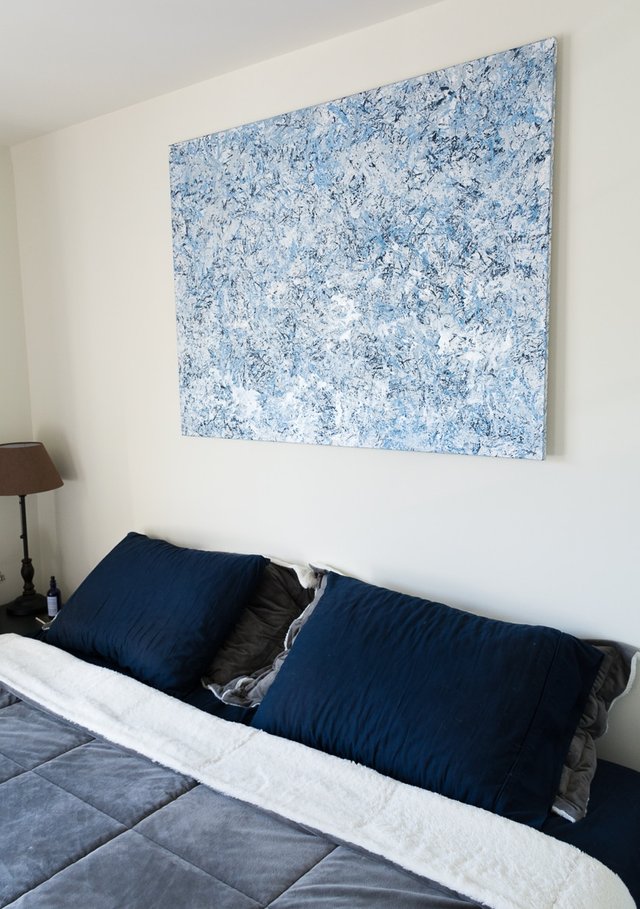
Step 3: I let this dry for around 15 minutes and after that poured my metallic silver onto another plate. The plume duster was sopping wet with blue paint now, so as opposed to purchasing another quill duster, I simply utilized scissors to remove the tips (beneath, left). At that point I just smeared the silver paint on utilizing no specific reasonable purpose. Is it accurate to say that you are seeing an example here? I think I even shut my eyes for part of it.
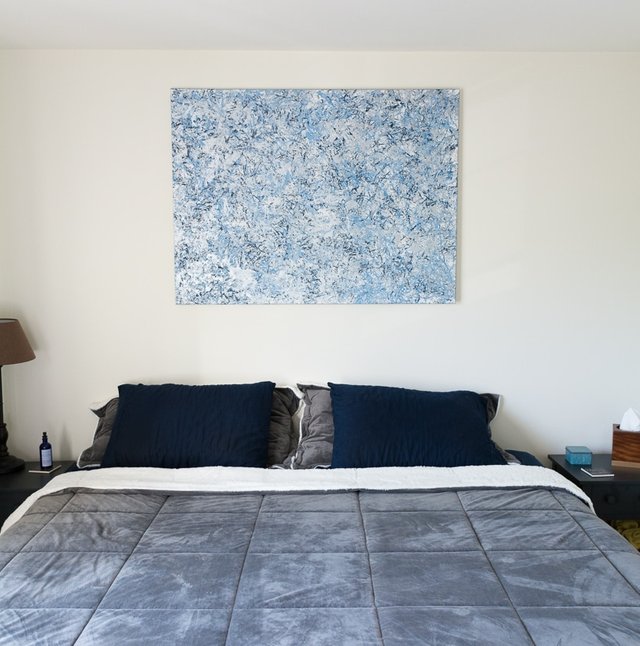
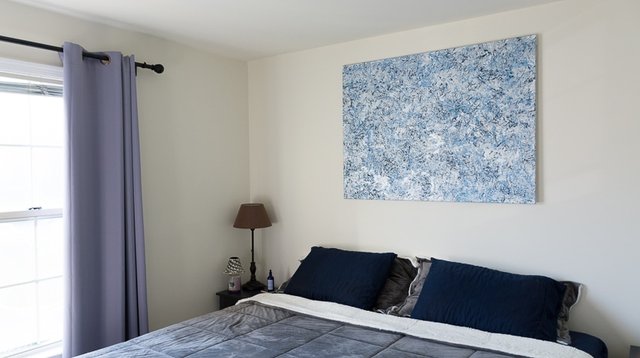
Following a couple of hours of drying, I hung it up in the room. I am so content with how this undertaking turned out, and it truly enables top off the vacant divider to space! Here is the vacant divider…
What's more, here it is in the wake of hanging my specialty!
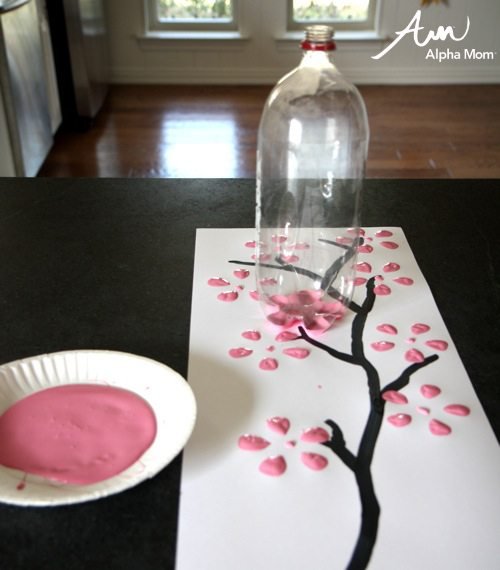
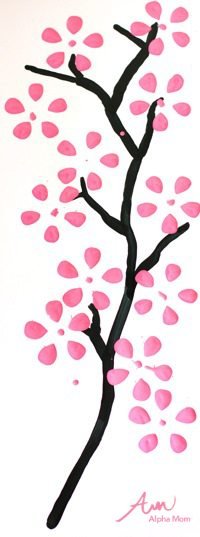
10.Abstract Flowers
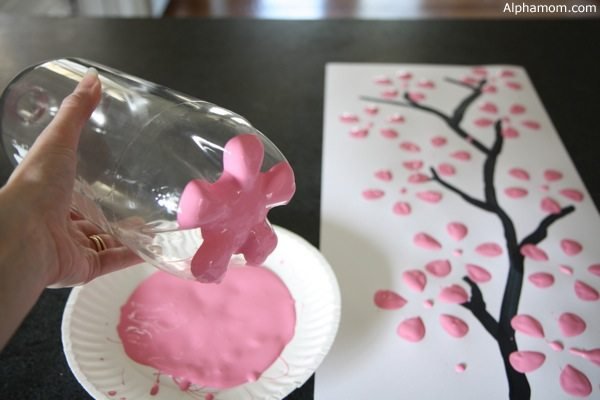
Pink blooms will soon show up on trees, and the National Cherry Blossom Festival begins on March 20 in Washington, D.C. In 1912 the city of Tokyo, Japan, gave Washington, D.C., an excellent endowment of 3,000 cherry bloom trees. In 2012, we praised the 100th commemoration of that blessing. All things considered, each year is a festival of that blessing as those trees elegance us with their yearly excellence and give incalculable measures of common euphoria and wonderment.
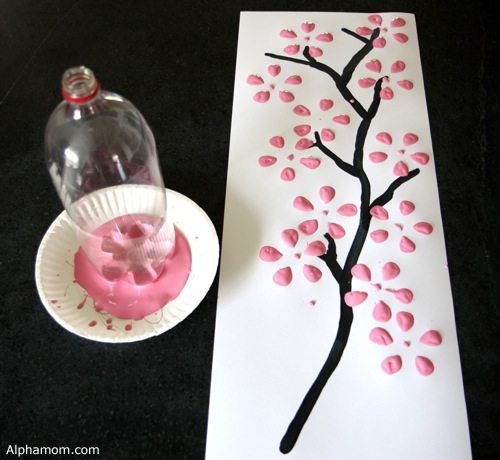
Make cherry bloom craftsmanship with a reused 2-liter pop container as a stamp! Here are the itemized guidelines.
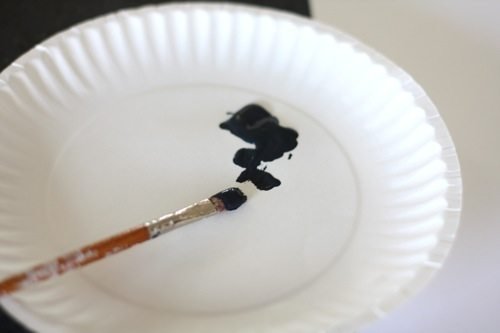
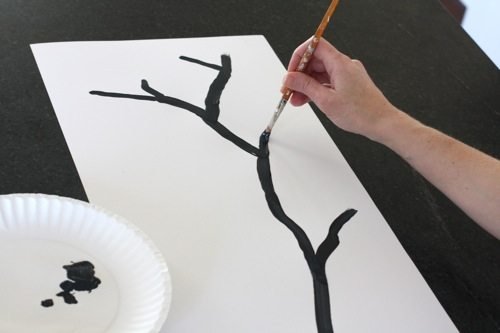
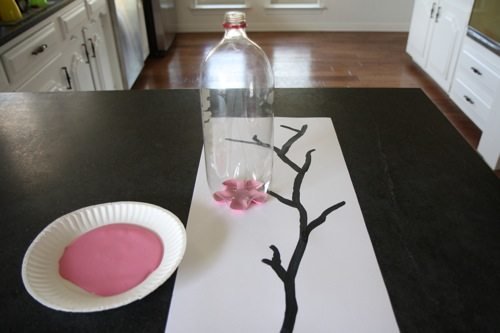
Begin by utilizing dim paint to paint a branch on publication board. Branches are anything but difficult to paint. On the off chance that you can't paint in a straight line, it looks far superior.
I cut this bit of notice board down the middle the long way since I need it to look more like a workmanship board than a notice.
Once the branch is painted, given it a chance to dry before proceeding with the stamping.
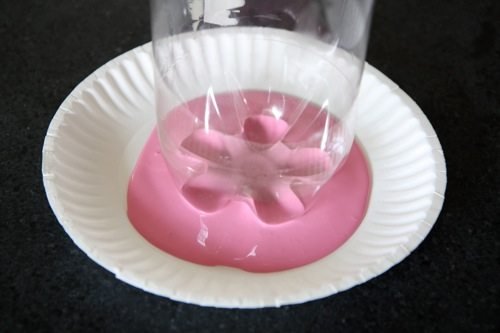
Presently how about we do the stamping. Pour some paint on a paper plate and plunge the plastic container.
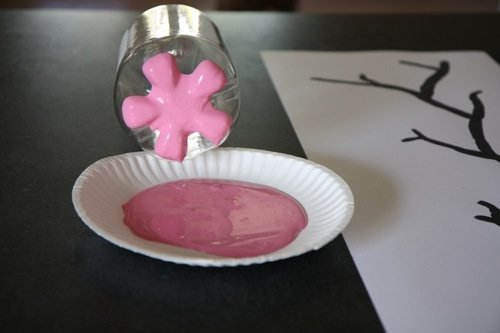
The base of 2-liter pop jug has five focuses like the five petals of a cherry bloom.
Press the plastic jug on the publication board, at that point lift up. Dunk the container in more paint each time you rehash the stamp. This is extremely fun, include the same number of blooms as you need.
Source
There is reasonable evidence that this article has been spun, rewritten, or reworded. Repeatedly posting such content is considered spam.
Spam is discouraged by the community, and may result in action from the cheetah bot.
More information and tips on sharing content.
If you believe this comment is in error, please contact us in #disputes on Discord
Very nice and helpful 😊
THANKYOU
Welcome 😊
You got a 2.63% upvote from @t50 courtesy of @amirmirza!
To use this service send a minimum of 0.010 SBD or STEEM to @t50 with the post you want upvoted as the memo.
Low Minimum Bids!
Increase Your Rep!
Draw Attention To your Post.
Earn Passive Income By Delegating SP to the Bot.
Overbid Protection
Voting processed every 2.4h (2,880 blocks).
@t50 follows all followers!
Invest and earn daily by delegating to the bot, we match or beat popular competitors.
If you do not want to receive upvotes from @t50 you can ask to be blacklisted by replying to this comment.
Want to promote your posts?
Send at least 0.1 STEEM or SBD to @dlivepromoter with the post link as the memo and receive an upvote on that post!Delegate Steem Power to @dlivepromoter for a daily payout!
25 SP, 50 SP, 100 SP, 250 SP, 500 SP, custom amountWe pay 85% of bids back to the delegators each day. The remaining 15% is contributed towards @dlivecommunity to help create a larger community.
Disclaimer:
@dlivepromoter is a part of the community project @dlivecommunity. We aim to help streamers navigate their way through @dlive and the overall Steem ecosystem. We are not affiliated with @dlive.♡ Your post just received some love and positivity from @haveaheart. Thanks for your generous contribution.
You just received a 6.99% upvote from @honestbot, courtesy of @amirmirza!

@fishbaitbot is luring fishes with a 7.54% upvote thanks to @amirmirza!Send 0.05SBD/STEEM or more for a free resteem along with the upvote!
Delegate to the @fishbaitbot and get 100% of the profits which is better than all upvote bots! Click on one of the following links to delegate 50SP, 100SP, 250SP, 500SP, 1000SP or 5000SP.
This bot, the steembottracker and some other projects were made possible thanks to @yabapmatt. Make sure you vote for him as witness!
You got a 6.43% upvote from @minnowvotes courtesy of @amirmirza!
You just received a 13.16% lifting from @botox ! You can also earn by making delegation to @botox.
Tu viens de recevoir un lifting de 13.16% de la part de @botox ! Tu peux également être récompensé en faisant de la délegation à @botox.