SEC-20 Wk1: Introduction to Pattern Making Class #1
You may be surprised seeing me participate in this challenge meant especially for women as that's their field. Even men sew women's outfit so they shouldn't be a big deal as I'm learning from the best - My dad. He's versatile in his work and makes unisex garment. So I thought of giving it a try as I'm still a learner. So the contest is about pattern making, particularly the sketch.
This reminds me of a time I went for my IT programme in a shop that sewing women's outfit is a priority. So I've had basic knowledge before now, coupled with the simple tutorial given in the challenge. These are some of the things I learnt while under my internship programme. I was well acquainted with basic measurements for sewing ladies wears and also basic patterns and drafts.
 |  |  |
|---|
- Bust B
- Shoulder SH
- Hips HP
- Waist W
- Sleeve Sl
- Length L etc.;
So for this challenge, I'll be making some basic pattern drafts on blouse and skirt and also indicate their their measurements and measured body parts.
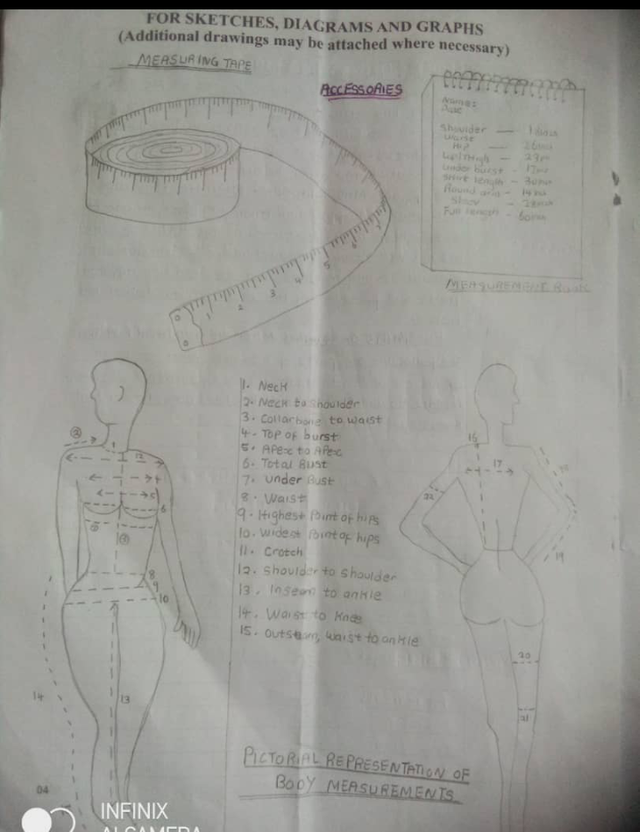
Name and indicate with your own images how far the measurements are taken to draw the base patterns of the blouse and skirt for women |
|---|
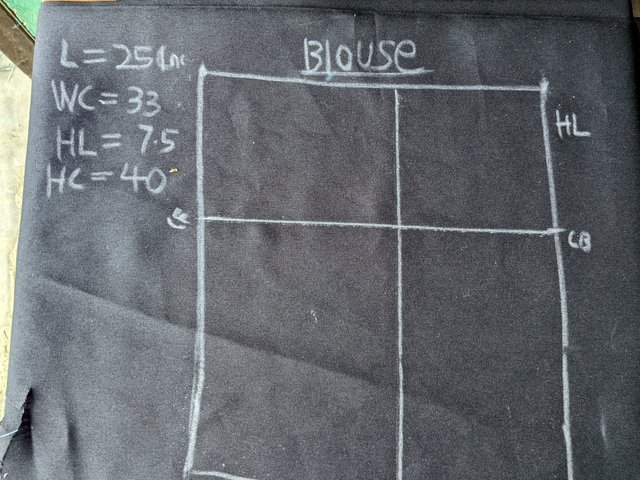
How to draft a basic blouse pattern? To draft a blouse pattern, you must take into consideration the following measurements before making drafts and taking these measurements in terms of inches is very essential.
| Shoulder | Neckline |
|---|---|
| Round sleeve | Bust |
| Length | UnderBust |
| Chest line | Waist |
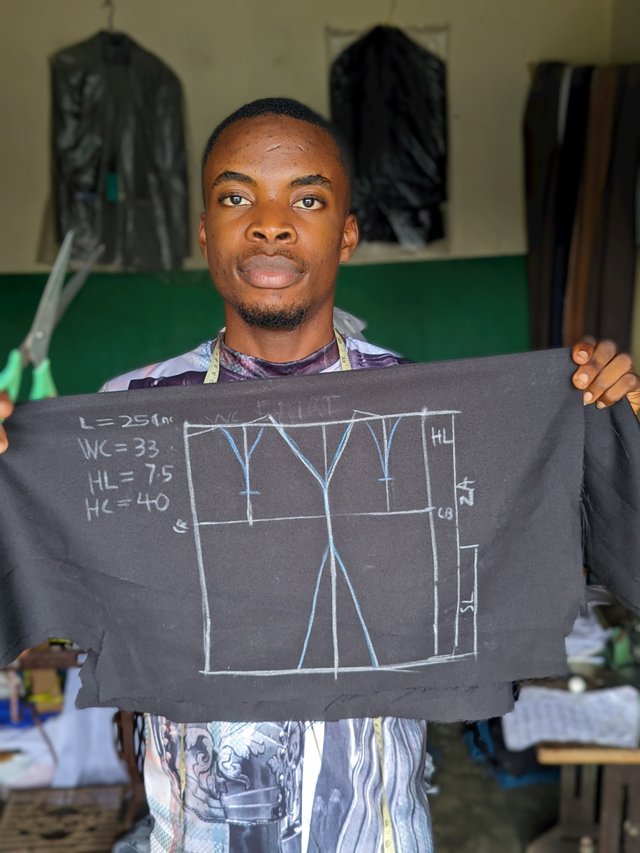
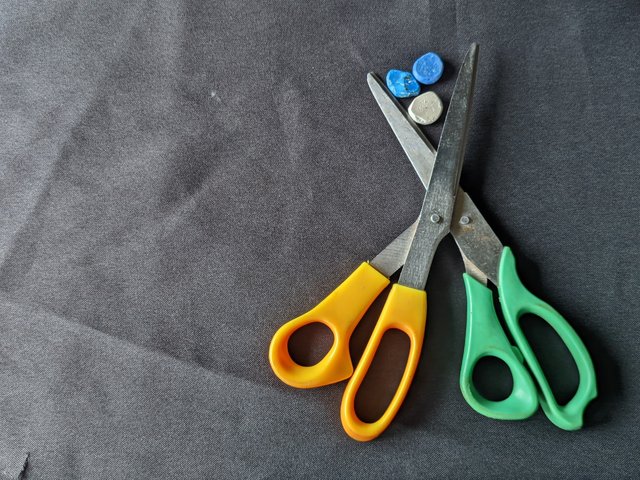
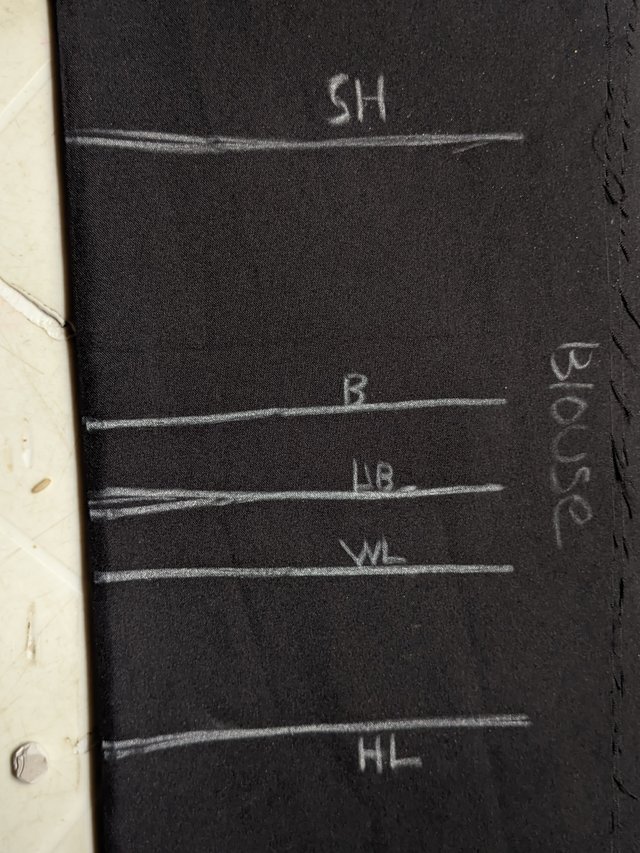
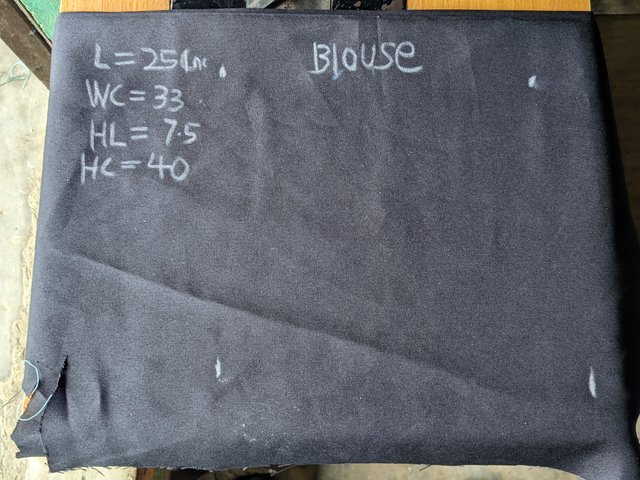
I didn't use any specific measurement because of what I was working on but regardless, these figures are just for sample sake and not actual figures. We'll be making use of a ruler, tape, chalk and a black material.
 |  |
|---|
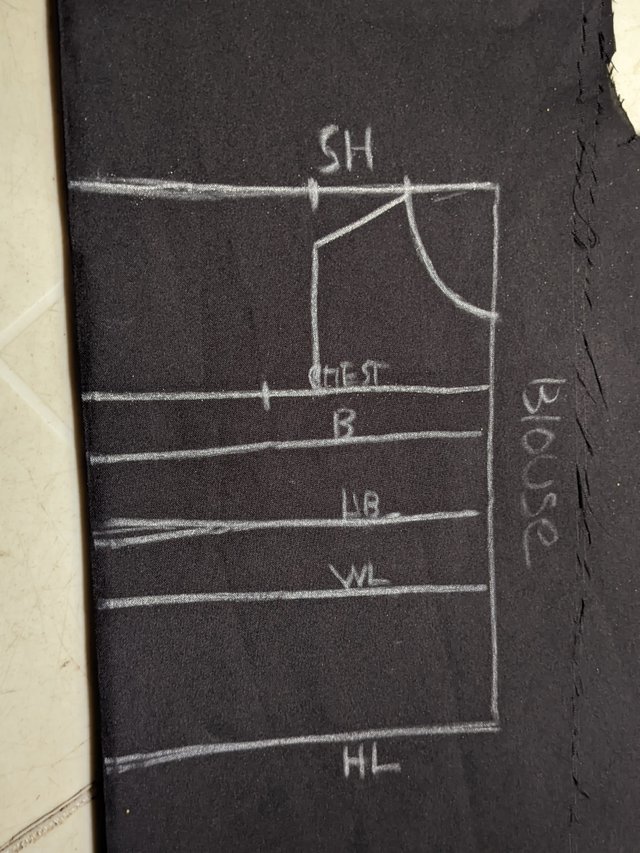
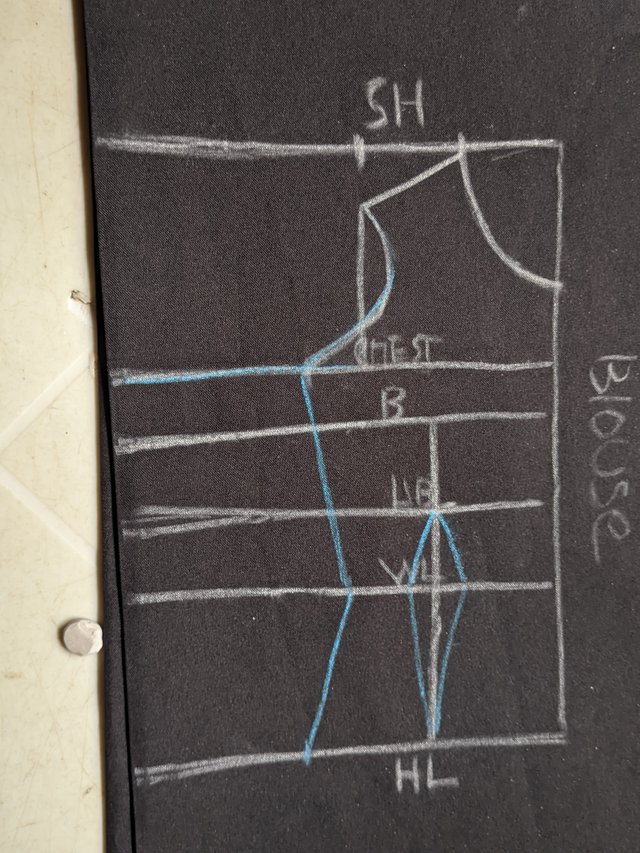
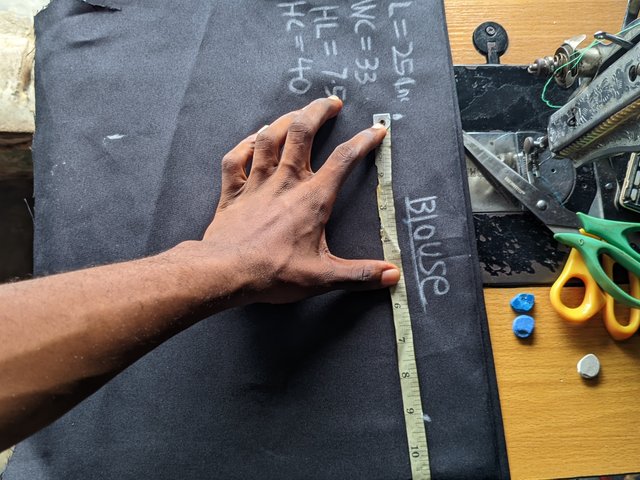
We'll draw a straight line at the top of the black material to signify the shoulder line. My use of this material is to provide a sketch and not the actual measurement of cuts. So from my shoulder line, I'll use my tape to measure my bust point at 3 inches. I'll still have to take measurements from my shoulder to underbust, which I assume is 4 inches.
 | Step 1 |
|---|
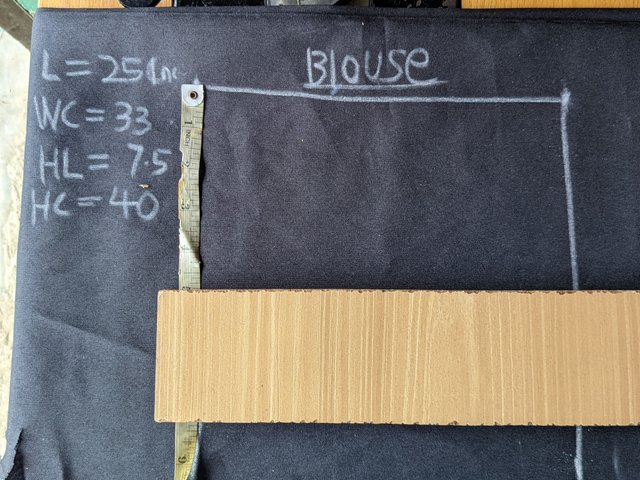
From my shoulder to waist is taken and measured. So I'll draw a straight line to indicate these points from shoulder to burst and waist line. From the shoulder, we'll determine how the length of our blouse will be to the abdomen and beyond. You'll have to take measurements that fit the person as shown in the draft pattern.
 | step 2 |
|---|
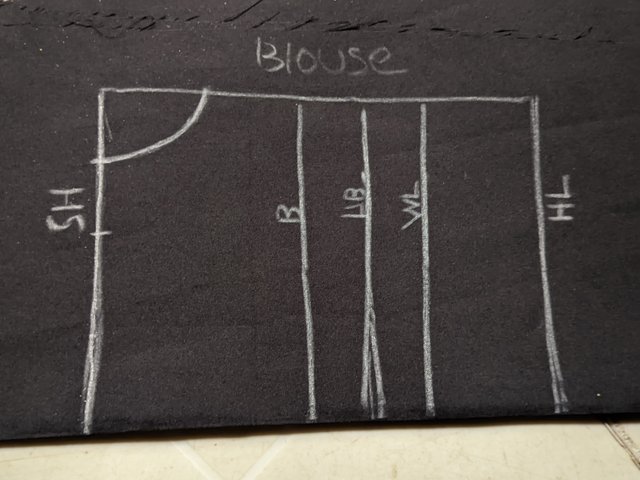
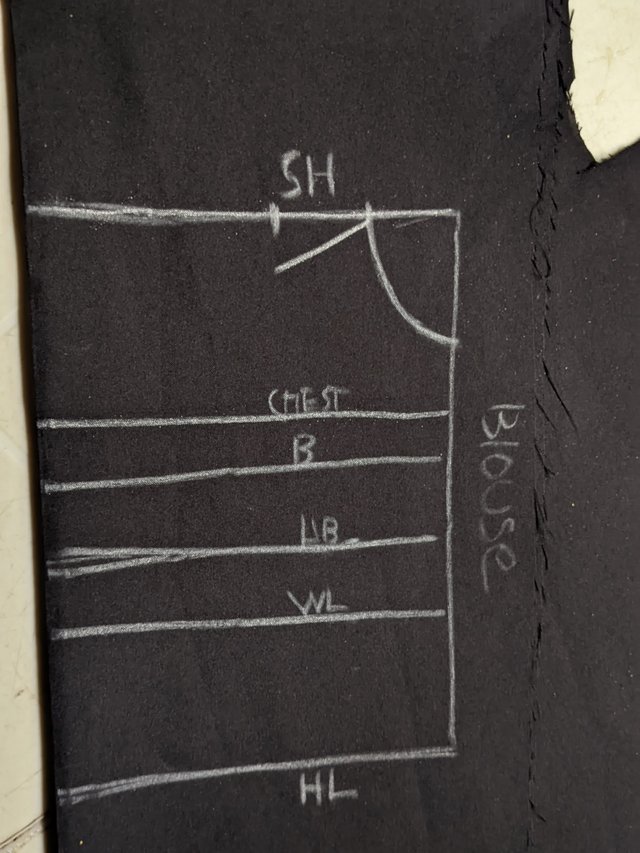
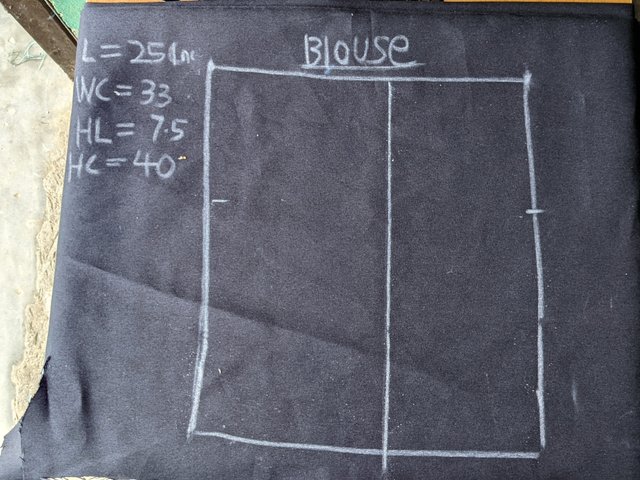
From the shoulder line, I'll take inches apart to draw or carve the neckline for the blouse as shown below. For the shoulder slope, which is always slanty, I'll divide my burst measurement by 6 and then add 1.5 inches to get the shoulder slope. From the created shoulder slope, I'll draw a straight line to meet the chest line.
 | Step 3 |
|---|
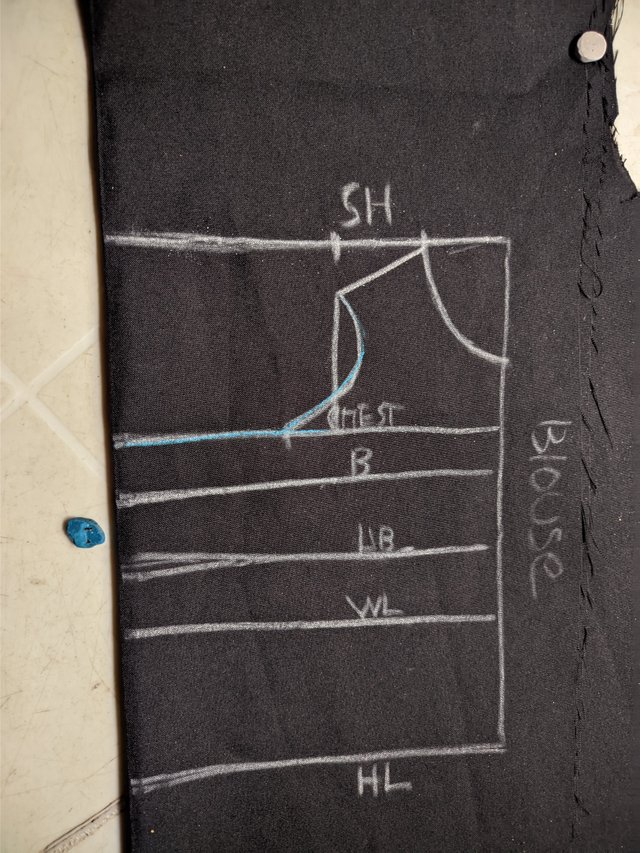
After doing this, I'll make points in the slope and divide the burst measurement by 4 on the chest line to make a curve. Now is to make the dart, and I'll divide my burst line into two from the actual measurement, and this division is done to take points on the bust line, under the burst line, chest and hem line, and then draw a long line to connect them. The dart is made on the waistline, and I'll make points considering how bursty a person is. I'll then connect my points to make the dart.
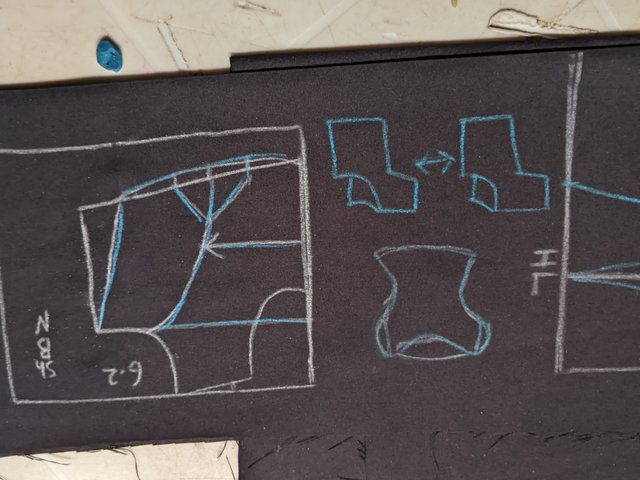
 Step 4 Step 4 | 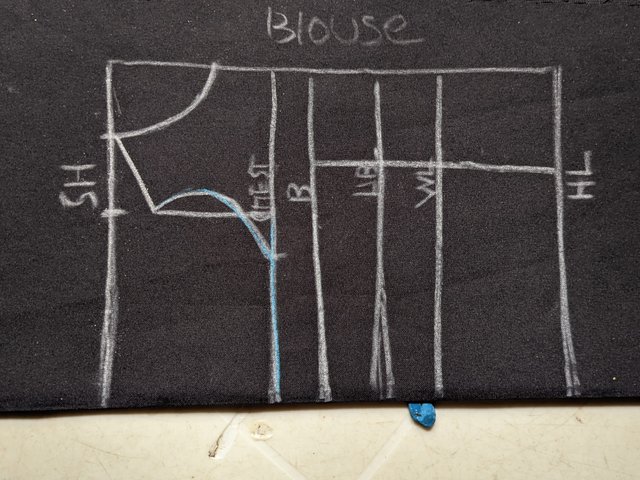 Step 5 Step 5 |
|---|---|
 | Step 6 |
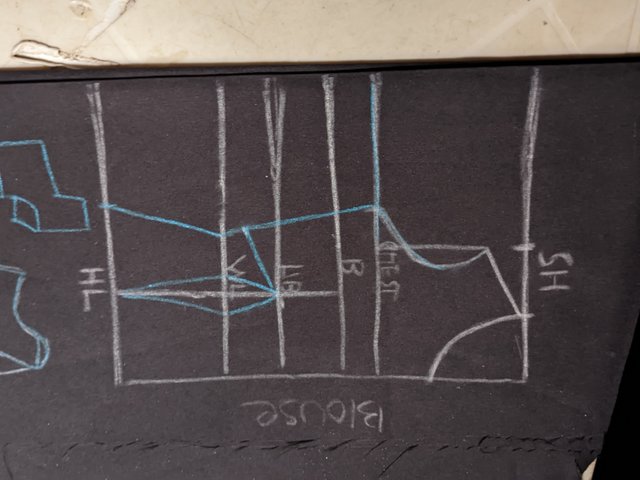
Now the body measurements. On the chest line, I'll divide my burst measurement and chest line by 4 and make points, and then divide my waist measurement by 4 and take points before adding the dart. I'll still divide my hip measurement on the hem line by 4 and make a point at which I'll connect the chest line to the waist line and then the hem line to make a curve.
 Step 7 Step 7 | 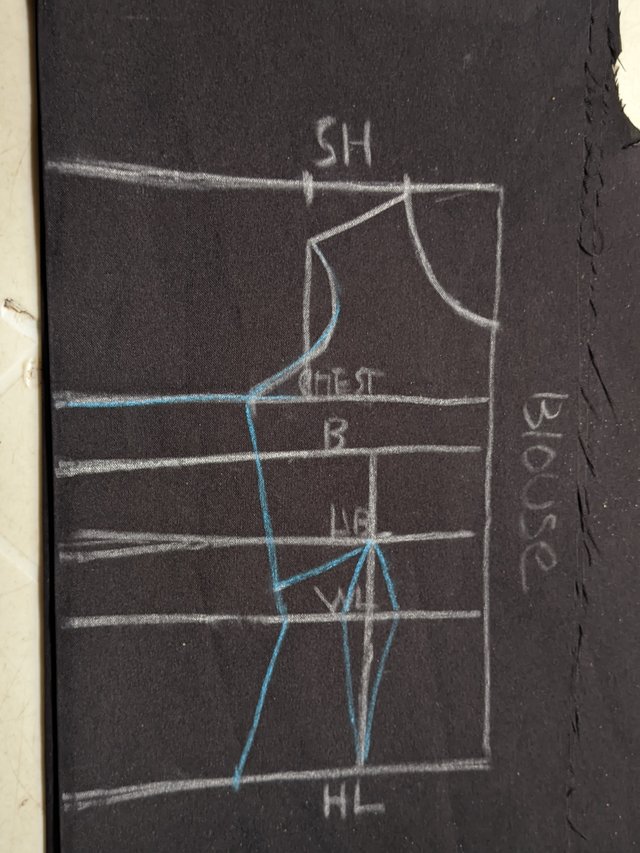 Step 8 Step 8 |
|---|
From the burst line, I'll make a point, which is the difference between shoulder to waist in front and at the back by 2 inches, and then connect a line to make my burst dart for the front.
 |  |
|---|
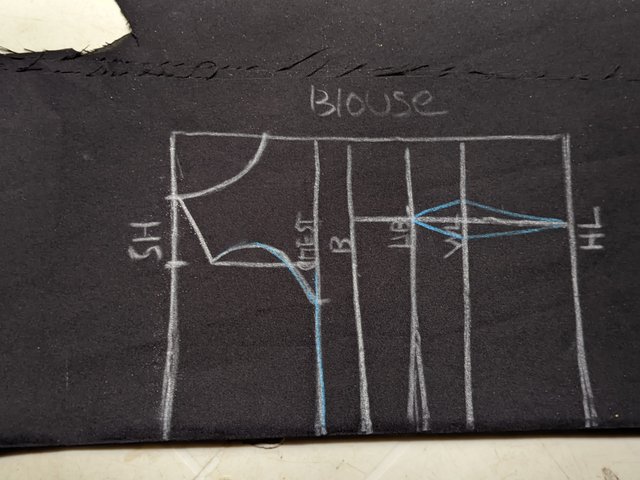
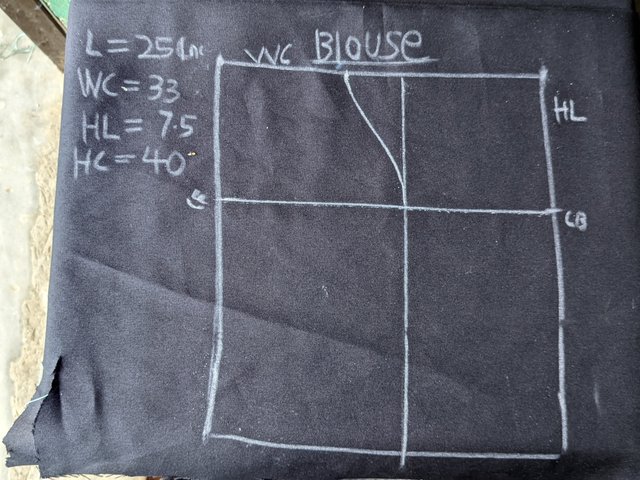
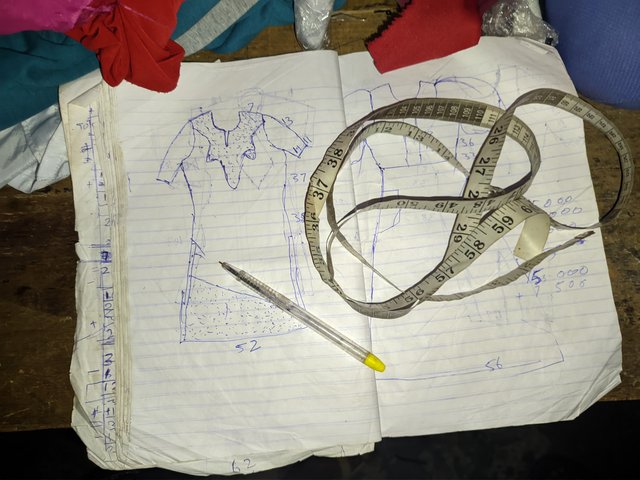
This may look complex, but it's very practical if you're handling a material. This is the front of my blouse and an actual sketch, not a full sketch from front to back.
How to draft a sketch pattern?
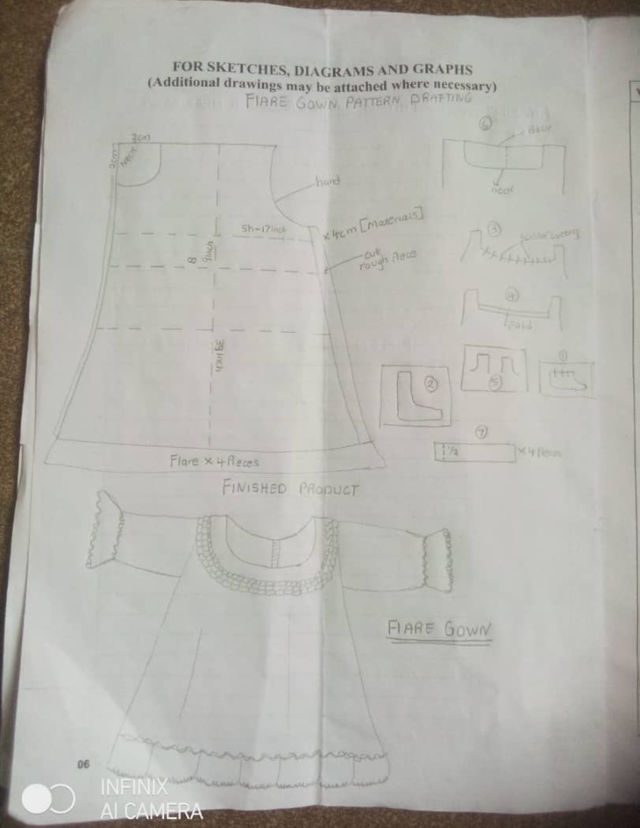
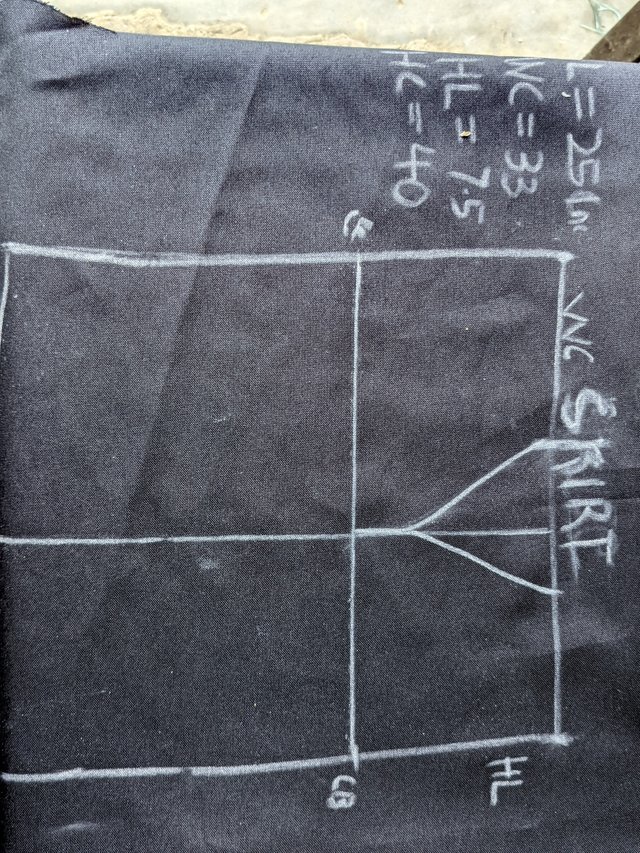
To draft a skirt pattern, you must take note of the following body measurements.
- Hips HP
- Waist W
- Basic slit
- waist to hip length
- Hip to hem length
- Skirt circumference
- Length of skirt L etc.;
Ignore the figures used as measurements and follow the steps.
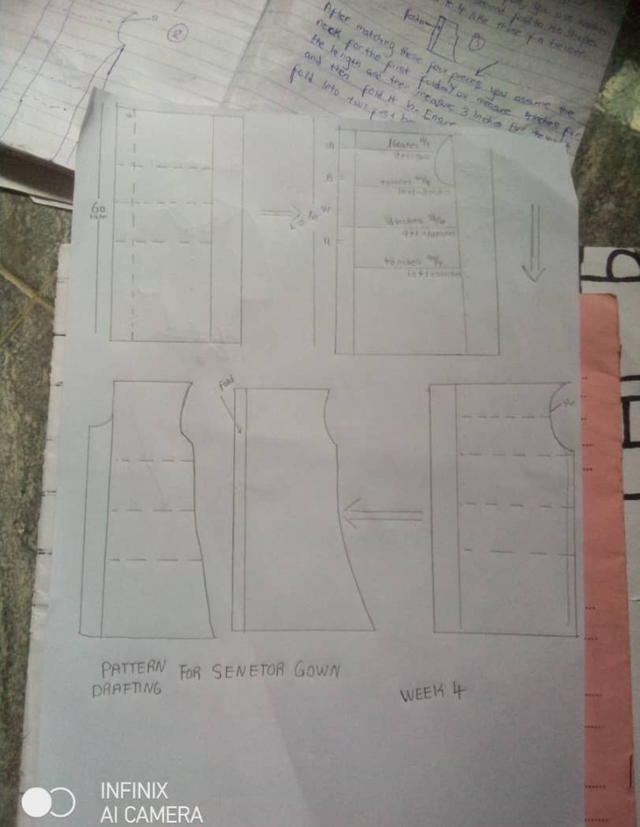
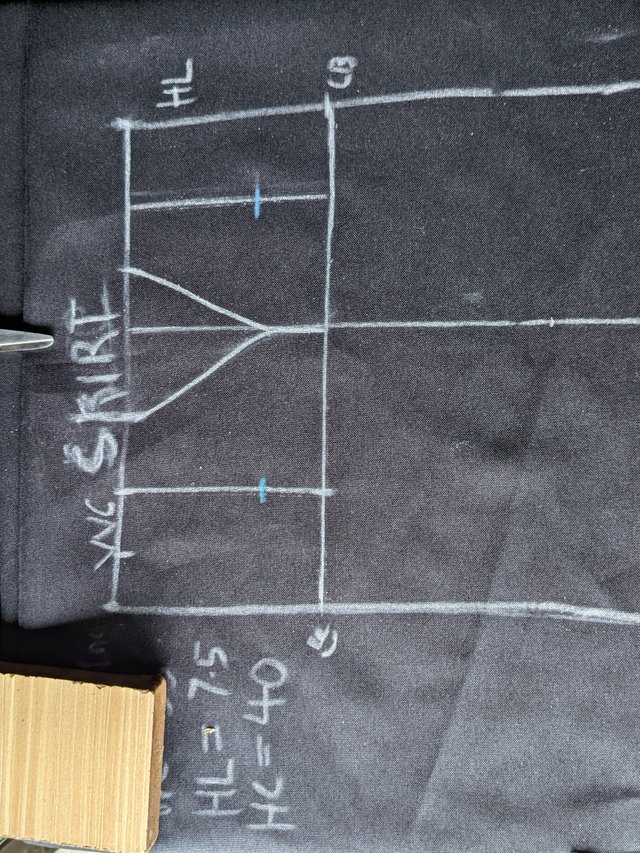
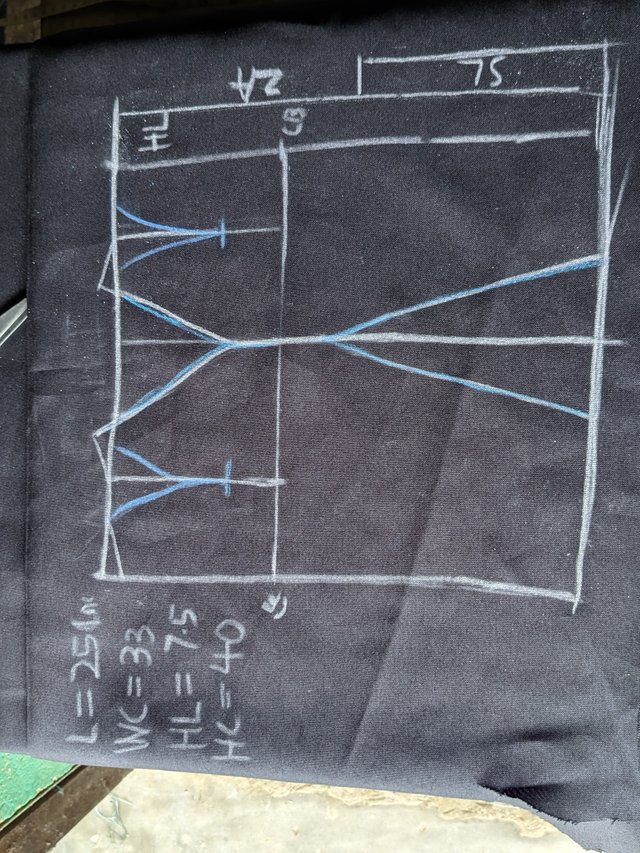
Just take a material and draw a line at the centre. We'll be working on some measurements used to make this draft. For a start, we'll start by dividing the hip circumference into two from the actual measurement and then place your tap in such a way that it divides the measurement you got after division.
|  |  |
|---|
You do the same for the bottom to get a straight draft. After this is done, we'll be marking the full length of this sketch by using the tape to take points. I used a considerable length for this draft. After this, I marked from the waist to the hip using the measurement of 7 inches and then drew a straight line to divide it for the centre back and front as labelled below.
 |  |  |
|---|
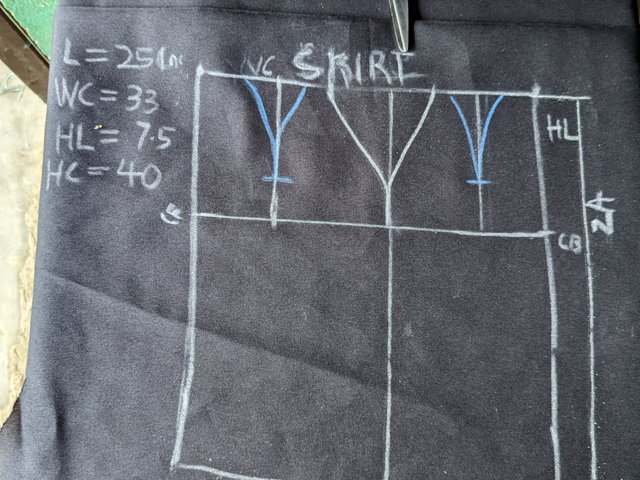
For the centre front, I marked the waist circumference using my tap and then divided the actual circumference by 4 and then added an inch. This point is connected to the hip, which is the curvy part of the body. So I'll be connecting from the waist circumference to the hit using a curve. After that, I'll do the same for the back.
 |  |
|---|---|
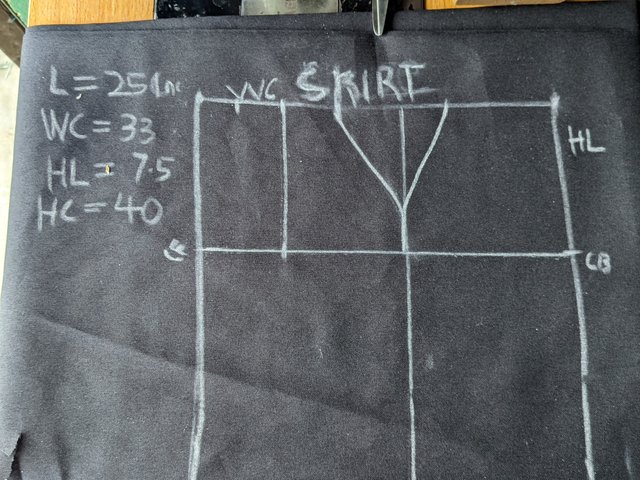 |  |
A dart is necessary for getting a fitted waist. I marked my burst span by some inches and then did the same for the hip line to create the dart line as shown. For the dart length, ensure your dart is 2 inches above the hip line to make this dart possible. I also did the same for the centre back and then connected it to fit the waist circumference.
 |  |
|---|
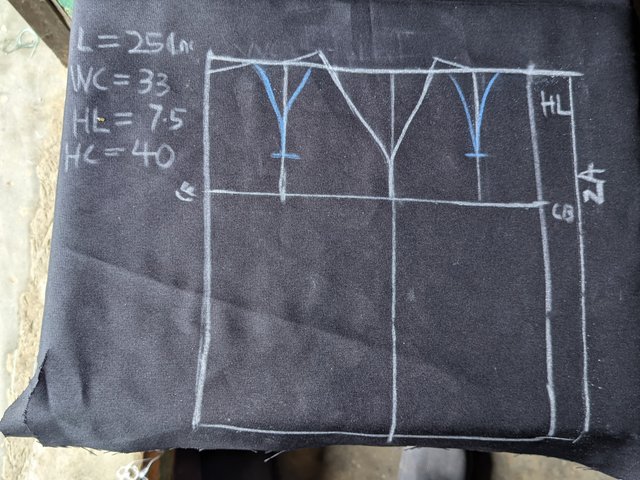
For zip inclusion, I drew out an inch from the centre back to make my zip allowance. I then did some connections with the dart legs and the hip curve. The slits are very important from the top of the skirt to create an extension for the slits on the centre back.
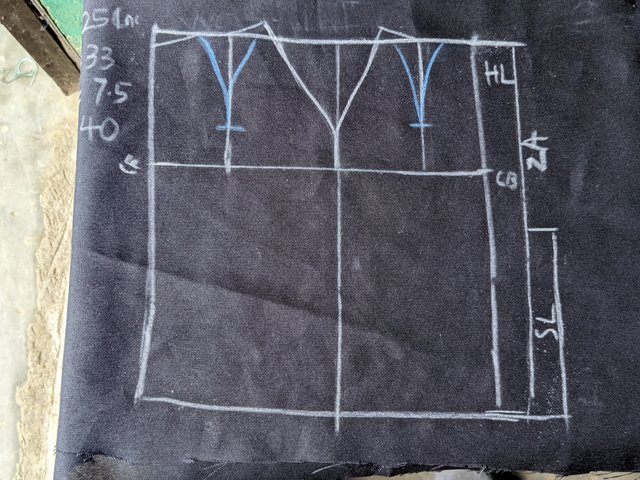
To make a pencil skirt or fitted skirt, we'll take an inch from the hip line and then connect it to the joining below in a V shape. If carved, you'll see the shape shown in an elegant way. These are basic sketches and not a tutorial to make the full sketch.
 |  |
|---|
How many measurements are taken into account to make the pattern of the blouse for women, with sizes personal? |
|---|
In measuring a blouse pattern for women with personal sizes, there are lots of measurements to take into consideration to fit the style and elegance of the individual in question. About 10-20 measurements are always taken as women usually have a choice of clothes and style to fit. Body shape, size and preferences are taken into consideration which includes
- The Bust: Not all women are busty and these are considered when sewing clothes for them to avoid weird dressing.
- The length measured from the base of the neckline to where it is desired to reach is considered. Some women prefer blouses that stop on their abdomen while others prefer it long to cover their abdomen.
- Waist measurement is taken from the waist line to suit the shape and size of the blouse around the waist region
- Sleeve length is also important in personal sizes as not all women prefer their sleeves to be entirely opened but body fit.
| Shoulder slope | Cuff circumference |
|---|---|
| Front Opening | Bust span |
| Neckline | Armhole depth |
| Sleeve circumference | Shoulder length |
These are some of the measurements for sewing blouse of women for personal sizes.
How many measurements are taken into account to make the blouse pattern for women with industrial sizes? |
|---|
For Industrial sizes, measurements of individuals aren't really necessary as a range of general measurements are taken in such a way that fits in to whatever body size in terms of length and shape.We usually have medium, large and Extra large industrially. These measurements are assumed and they are fewer compared to personal sizes. These includes;
| Bust | waist |
|---|---|
| Length | Sleeve length |
| Neck depth | Armhole depth |
| Shoulder slope |
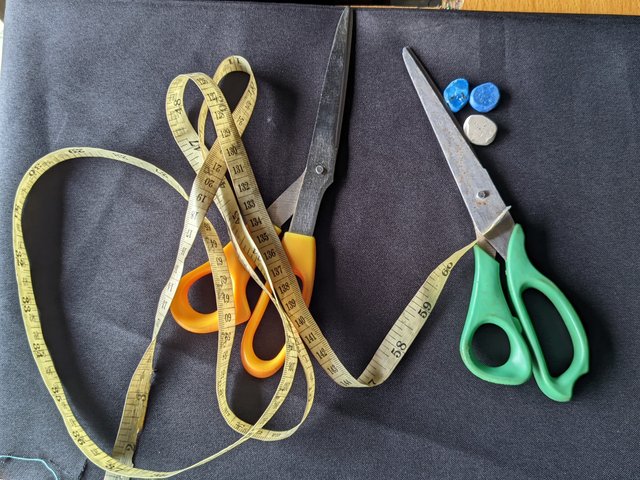
Shows an image of the 3 essential materials to take measurements. 2 are placed on the model and 1 is for measurement |
|---|
The three essential materials used to take measurements are the measuring tape, measuring book and a pen for recording measurements. These are very important materials especially the tape which is used for taking measurements of individuals based on their body size, shape, height etc so as to fit in to the desired garment..
Measuring tape helps a tailor **know how to draft or cut the materials to be sewn and this measurements if gotten wrong can spoil the garment made that's why the measurements are written on a measurement book for reference sake. The pen helps in doing this that's why these three materials are very essential in measurements while in pattern drafting, scissors, chalk and ruler comes in.
Why are you doing this course, what is your goal in real life? |
|---|
I'm doing this course because I want to diversify my skill. I'm good at men's wear but when it comes to women, I find it difficult to comprehend. That's the main reason I want to learn how to sew women outfits so I can combine it with the already had knowledge and start improving my business line to suit ladies.
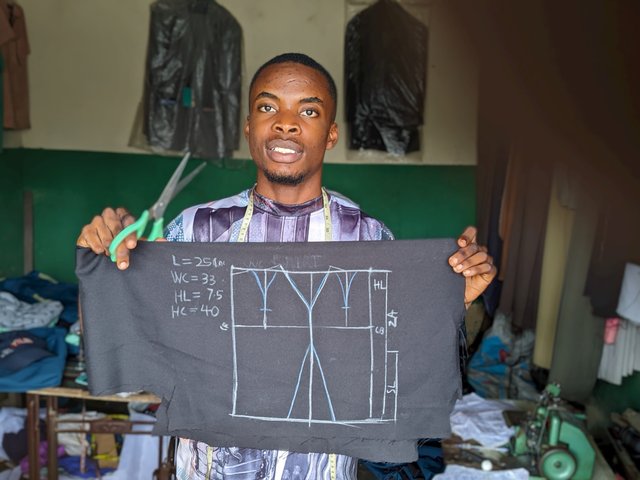
My goal in real life is to create exclusive garments just as my father does but the only barrier I have is completing my academic endeavours that's why the skill is on pause at the moment but that doesn't mean I won't go back to it as the world is well filled with fashion and trending dress sense or style. This is a picture of men on machine and one of the dress I'm proud of making is this.
 |  |
|---|
I'm done with my assignment and I thank the lecturer for using video tutorials to aid our understanding. In conclusion, measurements are very important in pattern making. Any mistake in mistake and drafting spoils the style of clothes you want to sew. So you should be very mindful to make your customers look demure.
I invite @basil20, @davidmarkgeorge and @patjewell
Cc,
@lunasilver
Plagiarism Free / AI Article Free
* #burnsteem25
* Community
* Charity
null 25% ✔️
steembetterlife ❌
worldsmile 10%❌
Appeal to community members:
Verified by @𝘩𝘦𝘳𝘪𝘢𝘥𝘪
Awh, it is so nice to see your entry in this contest.
Well, what can I say? You've learned from the best, your father. And now through this contest, you can show us how it is done.
I gave up on making clothes lllooonnnggg ago, and I don't think I will even try pattern making.
Best wishes!
Thanks for the compliments. I just thought of doing this though I'm more on men than women. You were once a garment marker?
I did the printing of material for kids clothing and also designed the clothing. An aunt of mine then did the sewing.
I then held a fashion show in support of a charity organization.
Sho, that was nearly 30 years ago.
You brought back a lot of memories, my friend. (•ิ‿•ิ)
Upvoted. Thank You for sending some of your rewards to @null. It will make Steem stronger.
Thanks for the upvote @oleh
https://x.com/bossj23Mod/status/1834430274819559854?t=2W5R3KYrMagzteqH7OX1_Q&s=19
Good job!
This post has been upvoted/supported by Team 7 via @httr4life. Our team supports content that adds to the community.